This Fiero was one I built for myself, when you are the local Fiero club president and you haven't owned a driving one in years you start to feel you are letting everybody down.
So it began with the chance to buy a 1988 fiero that I had owned in years past and I couldn't pass up the price. The car had dropped a valve and been chewed on by a dog a little bit and to be honest was exactly what I was looking for.
Having done as many 3800sc swaps as I have for customers, and honestly never being the biggest fan of the exhaust note I wanted to take a different approach. I also had this 3900 engine sitting in the shop longer than I had the fiero so it was the logical choice and things started to take shape.
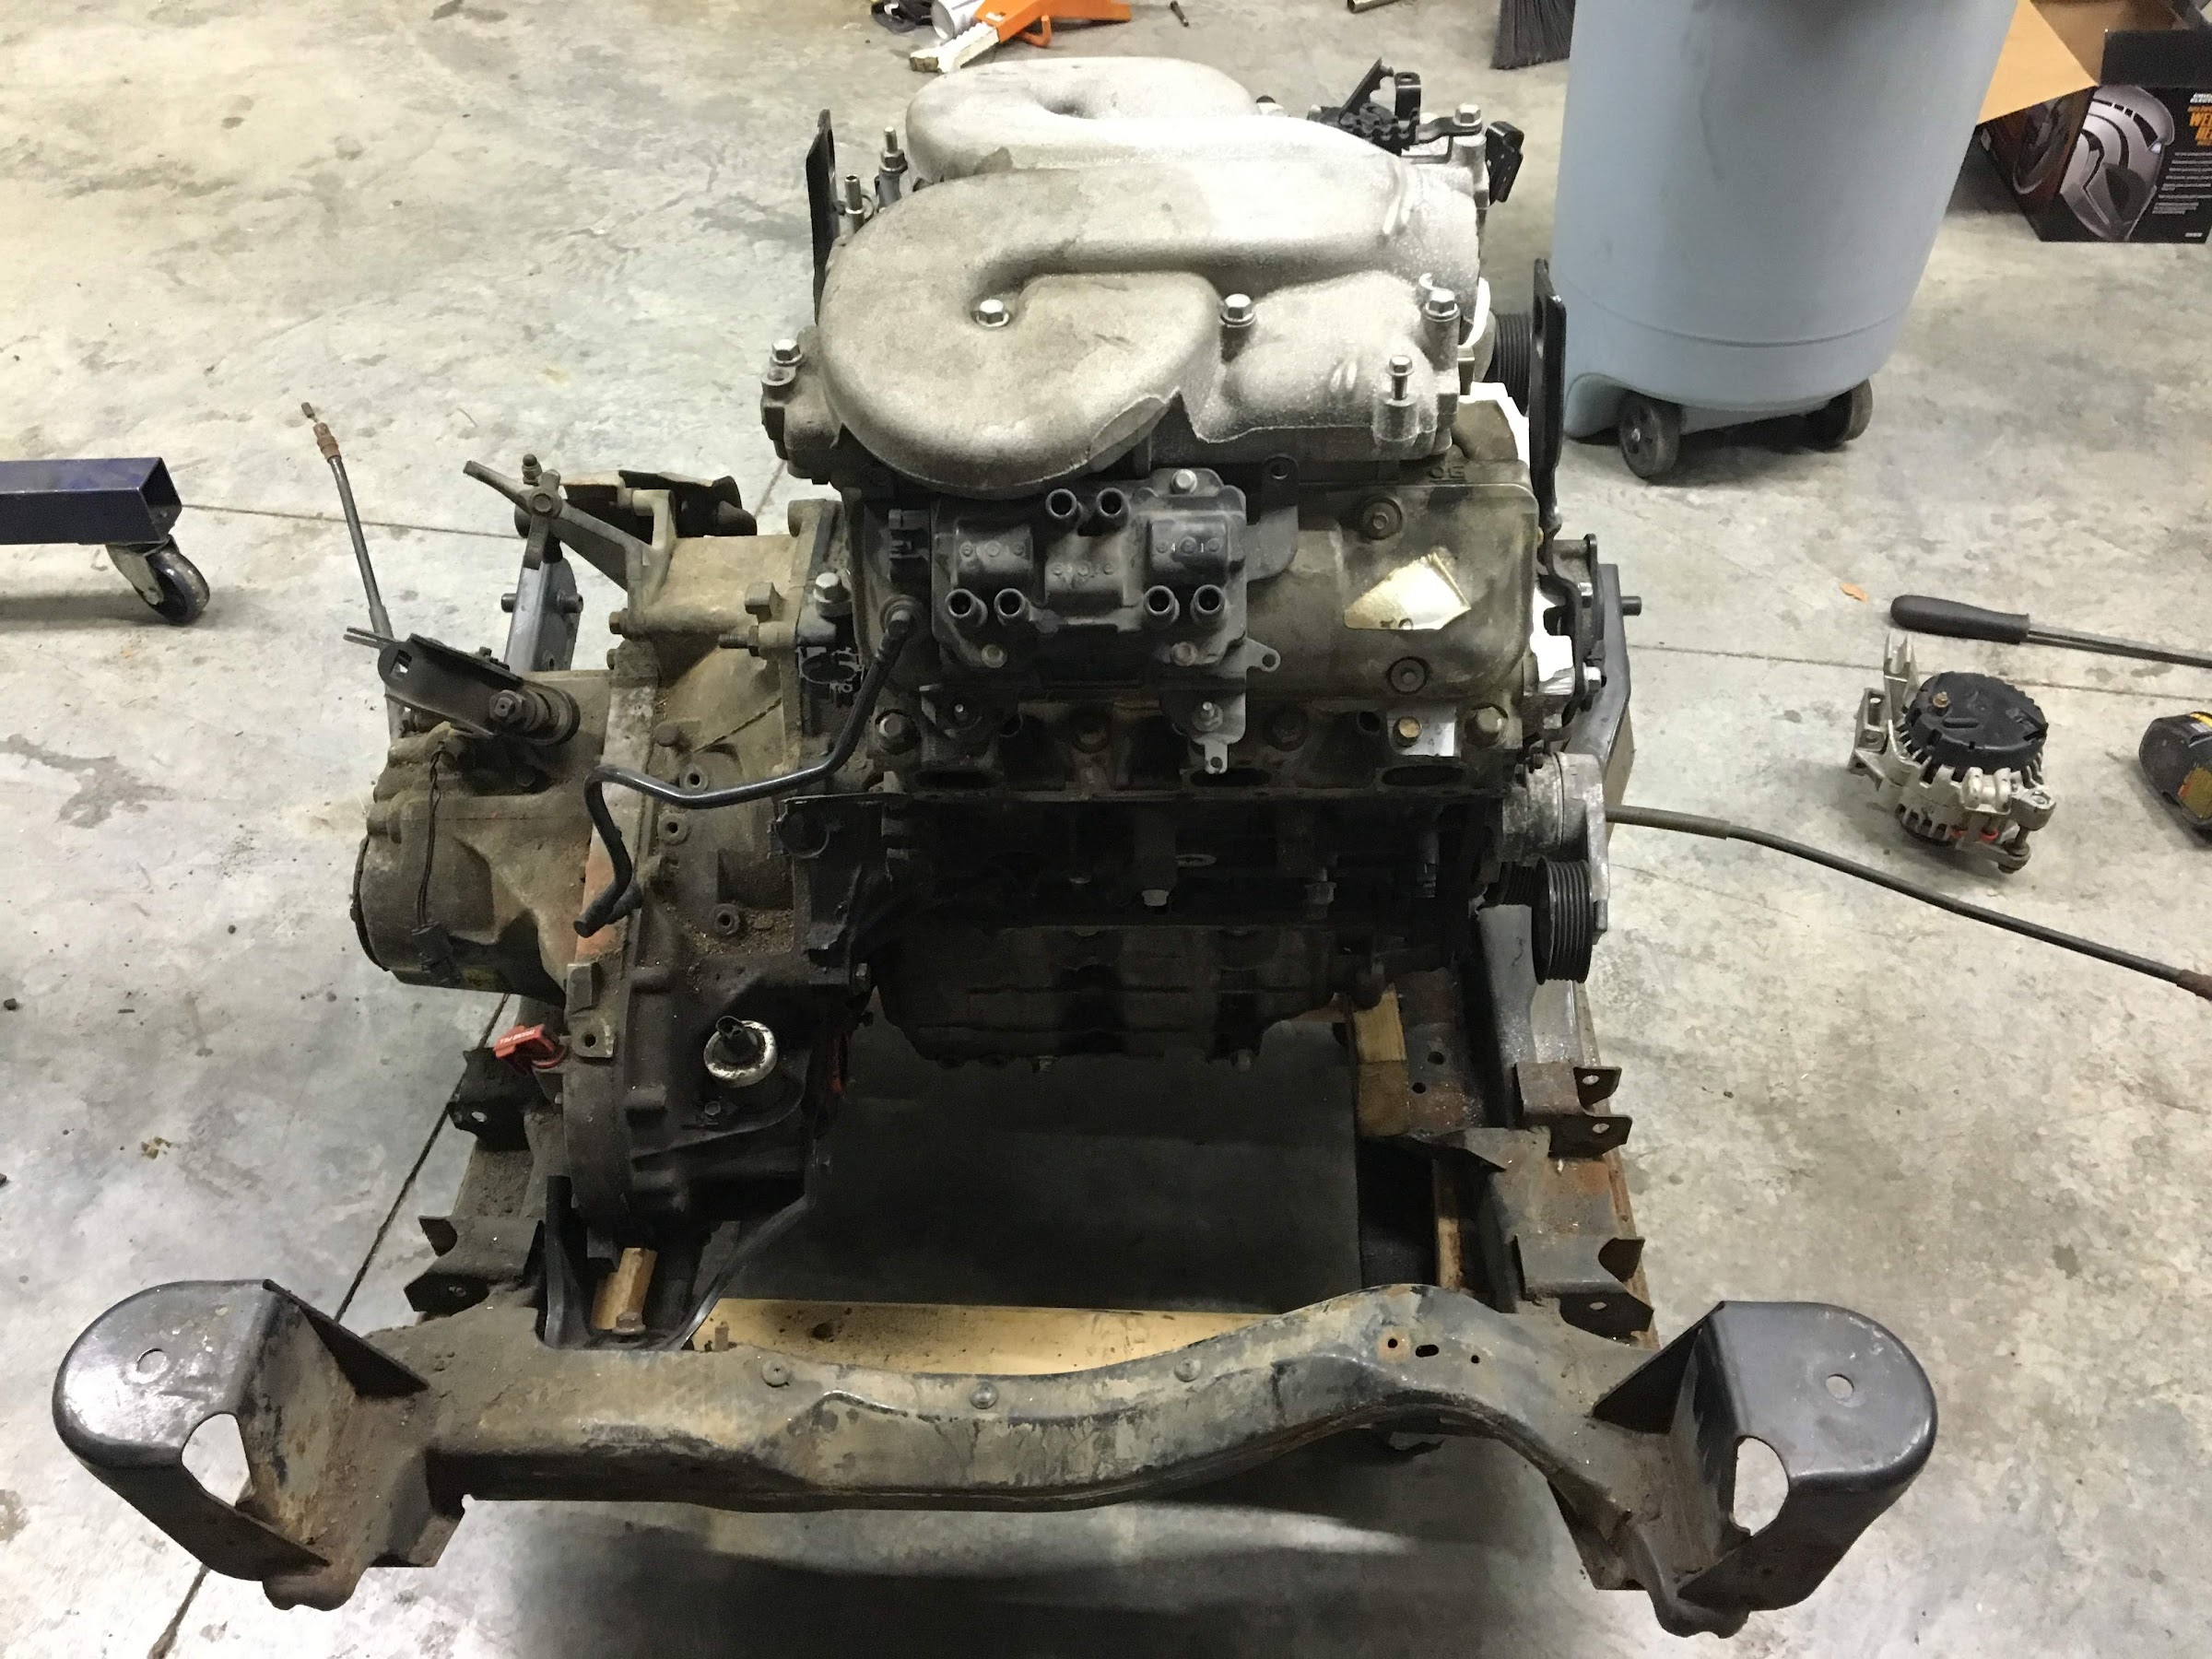
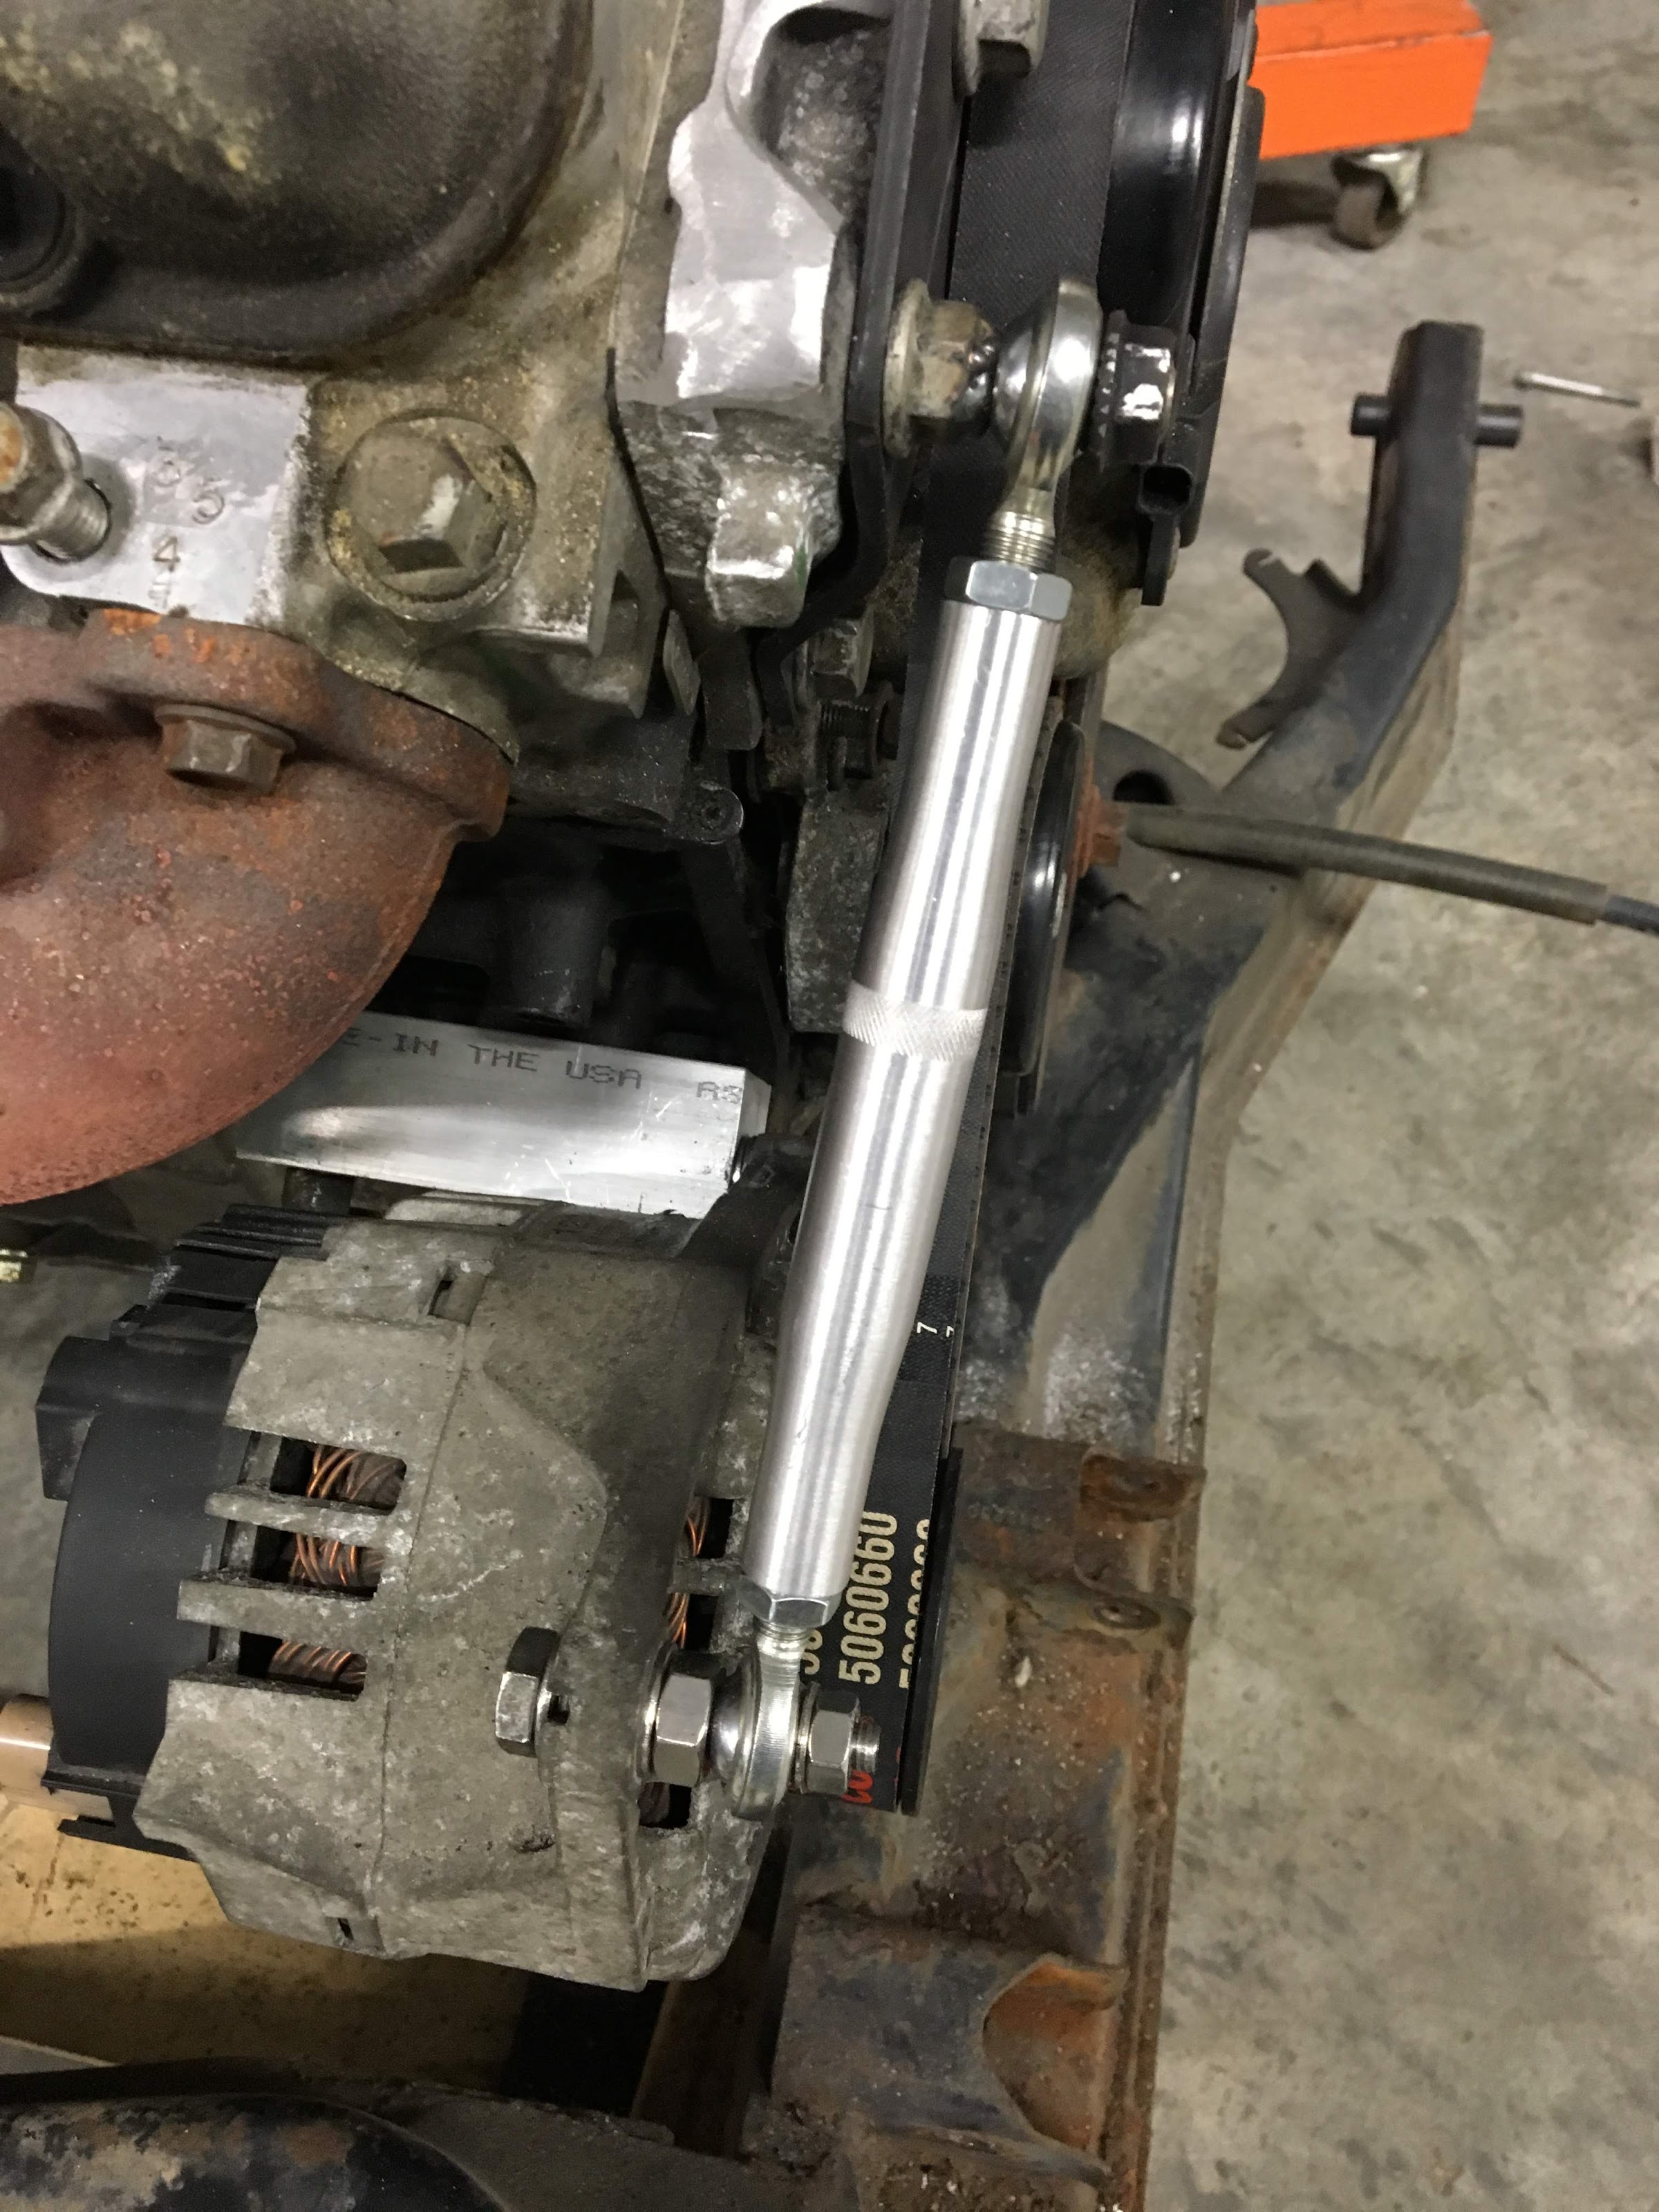
As with all swaps there are problems and challenges with working around putting an engine that wasn't meant to be somewhere in a new home. The 3900 surprisingly swapped into a fiero goes better than most. You have to do a low mount alternator, I went with something sitting on the shelf and used an audi 2.7t alternator and made a simple bracket for it:
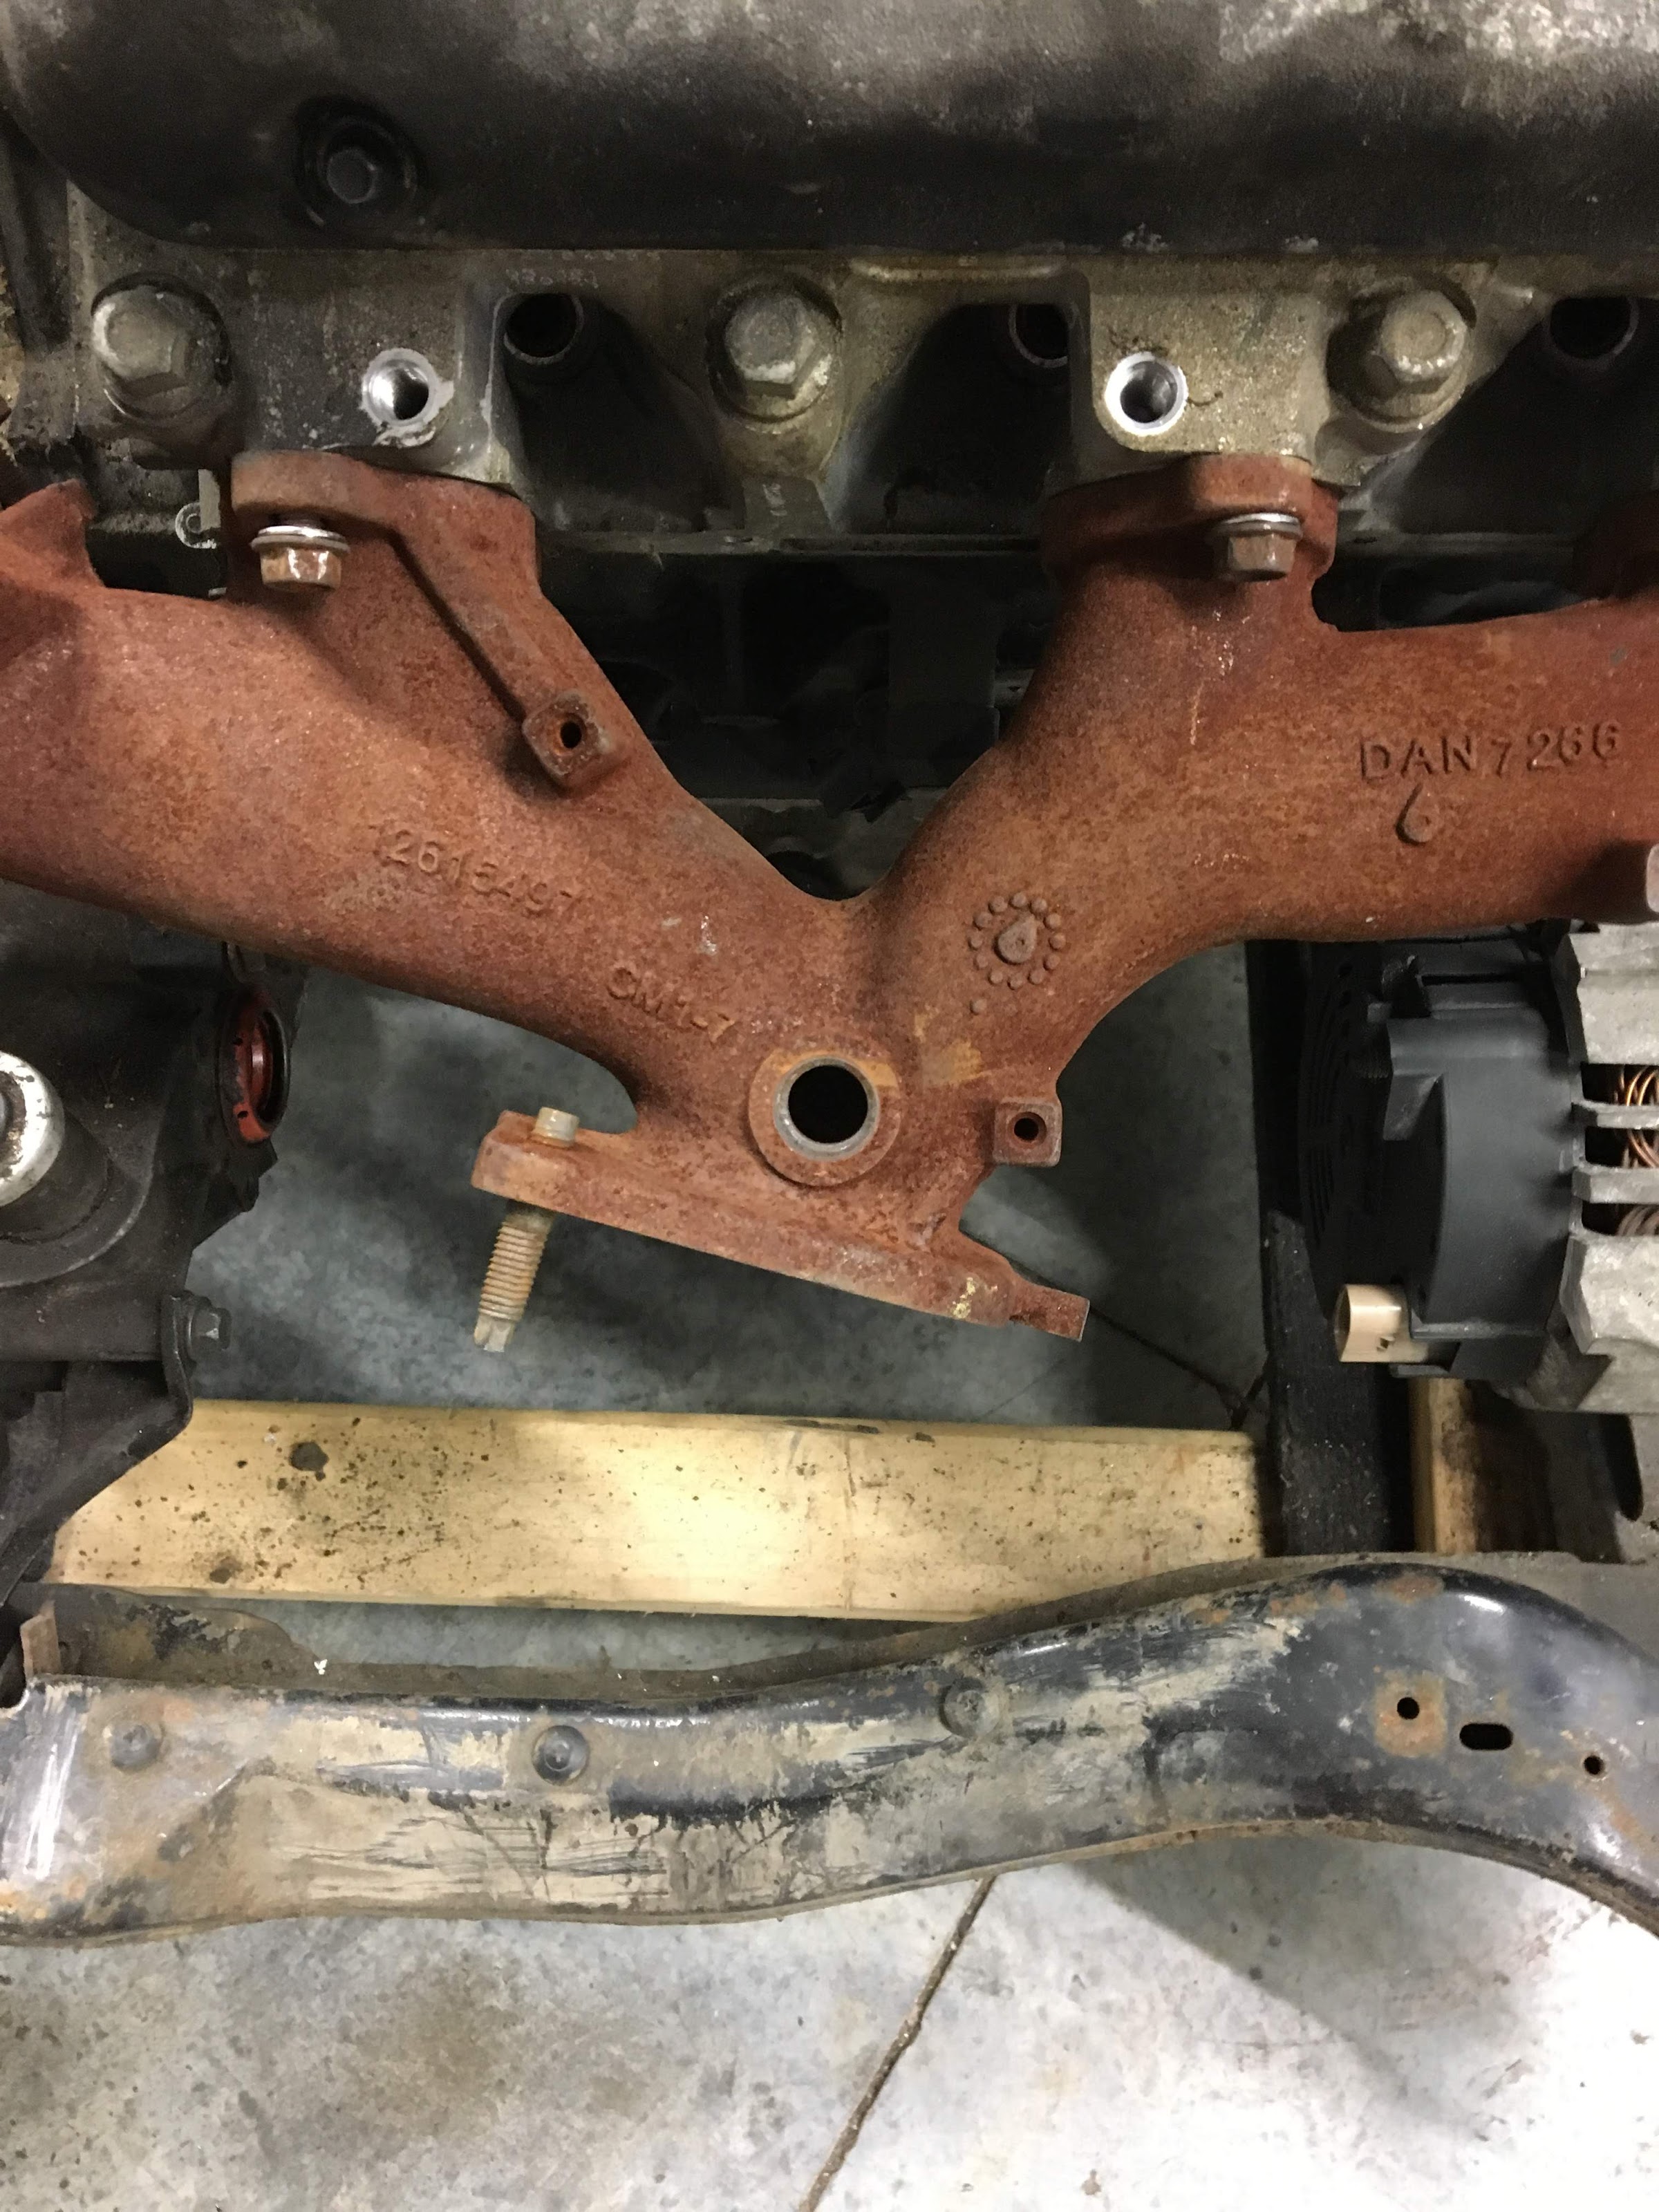
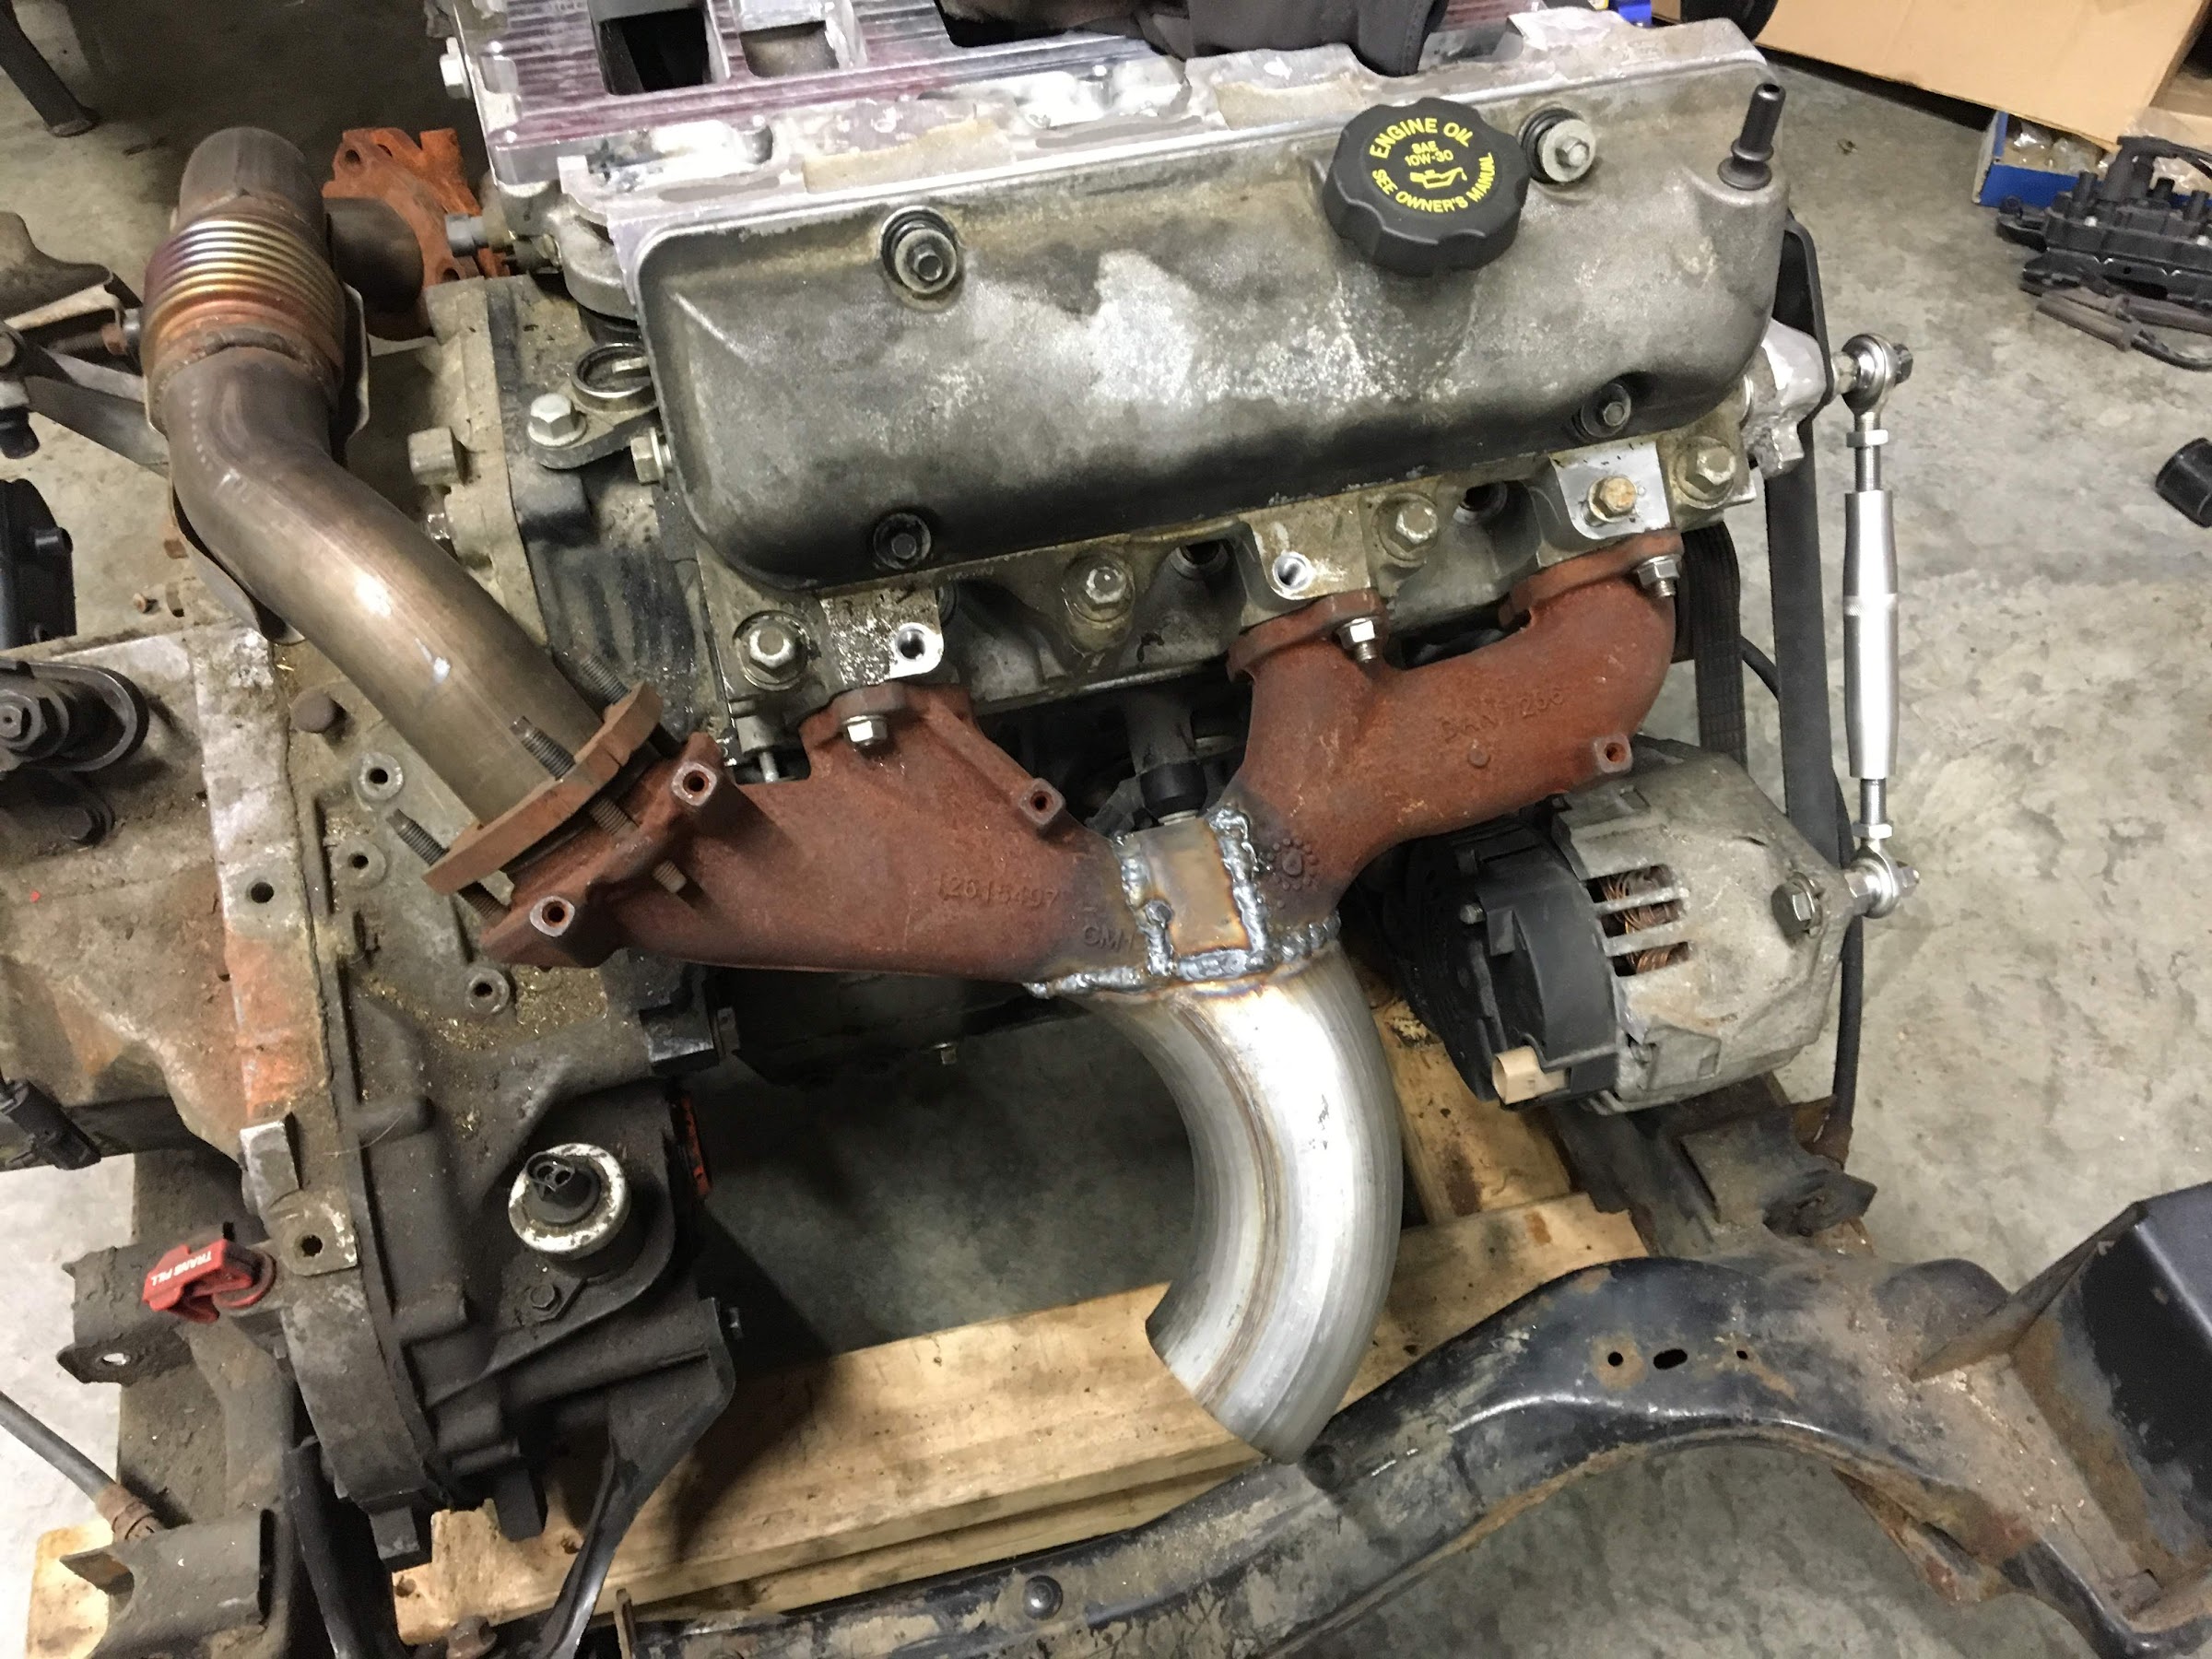
While doing a swap you also want to overcome some of the problems with cars from their factory installation. On the 3900 one of those things was the restrictive exhaust. Later I focused on alleviate some of the restriction by just cutting it out, along with the factory flange that required a gasket and the factory location of the o2 sensor:
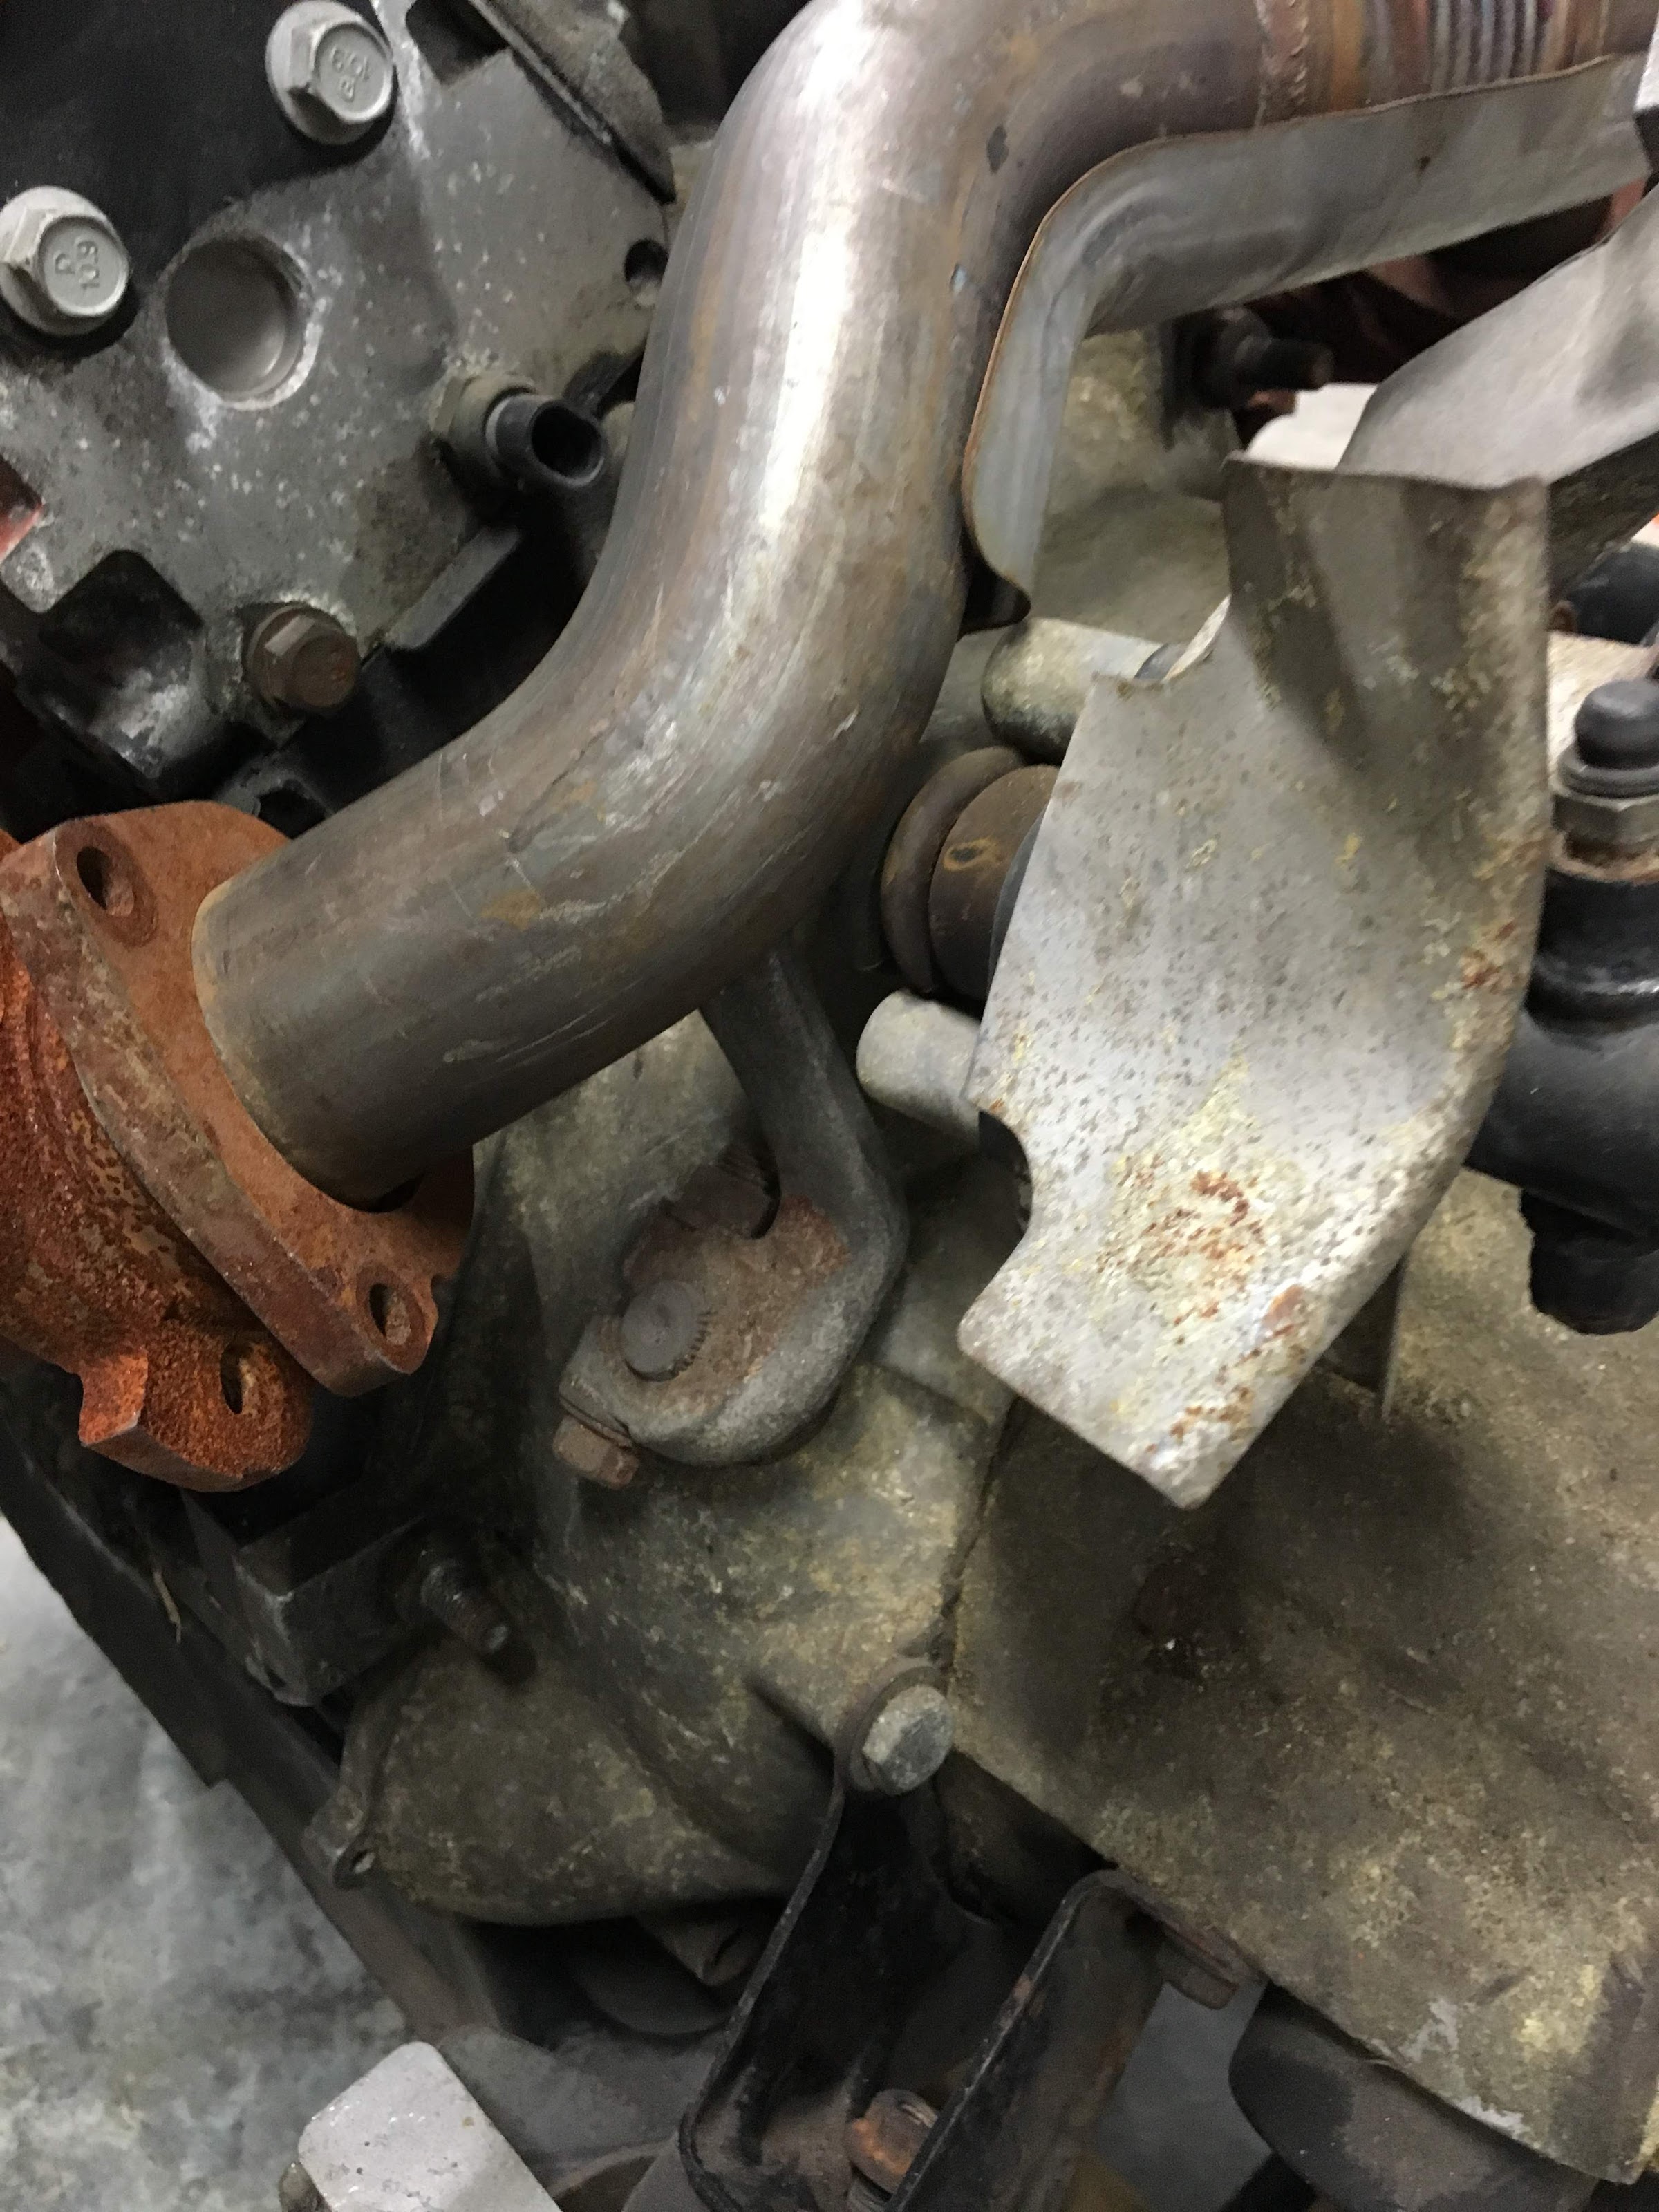
One of the last big issues was the exhaust crossover, while it did fit, the clearance to the slave cylinder was not ideal:
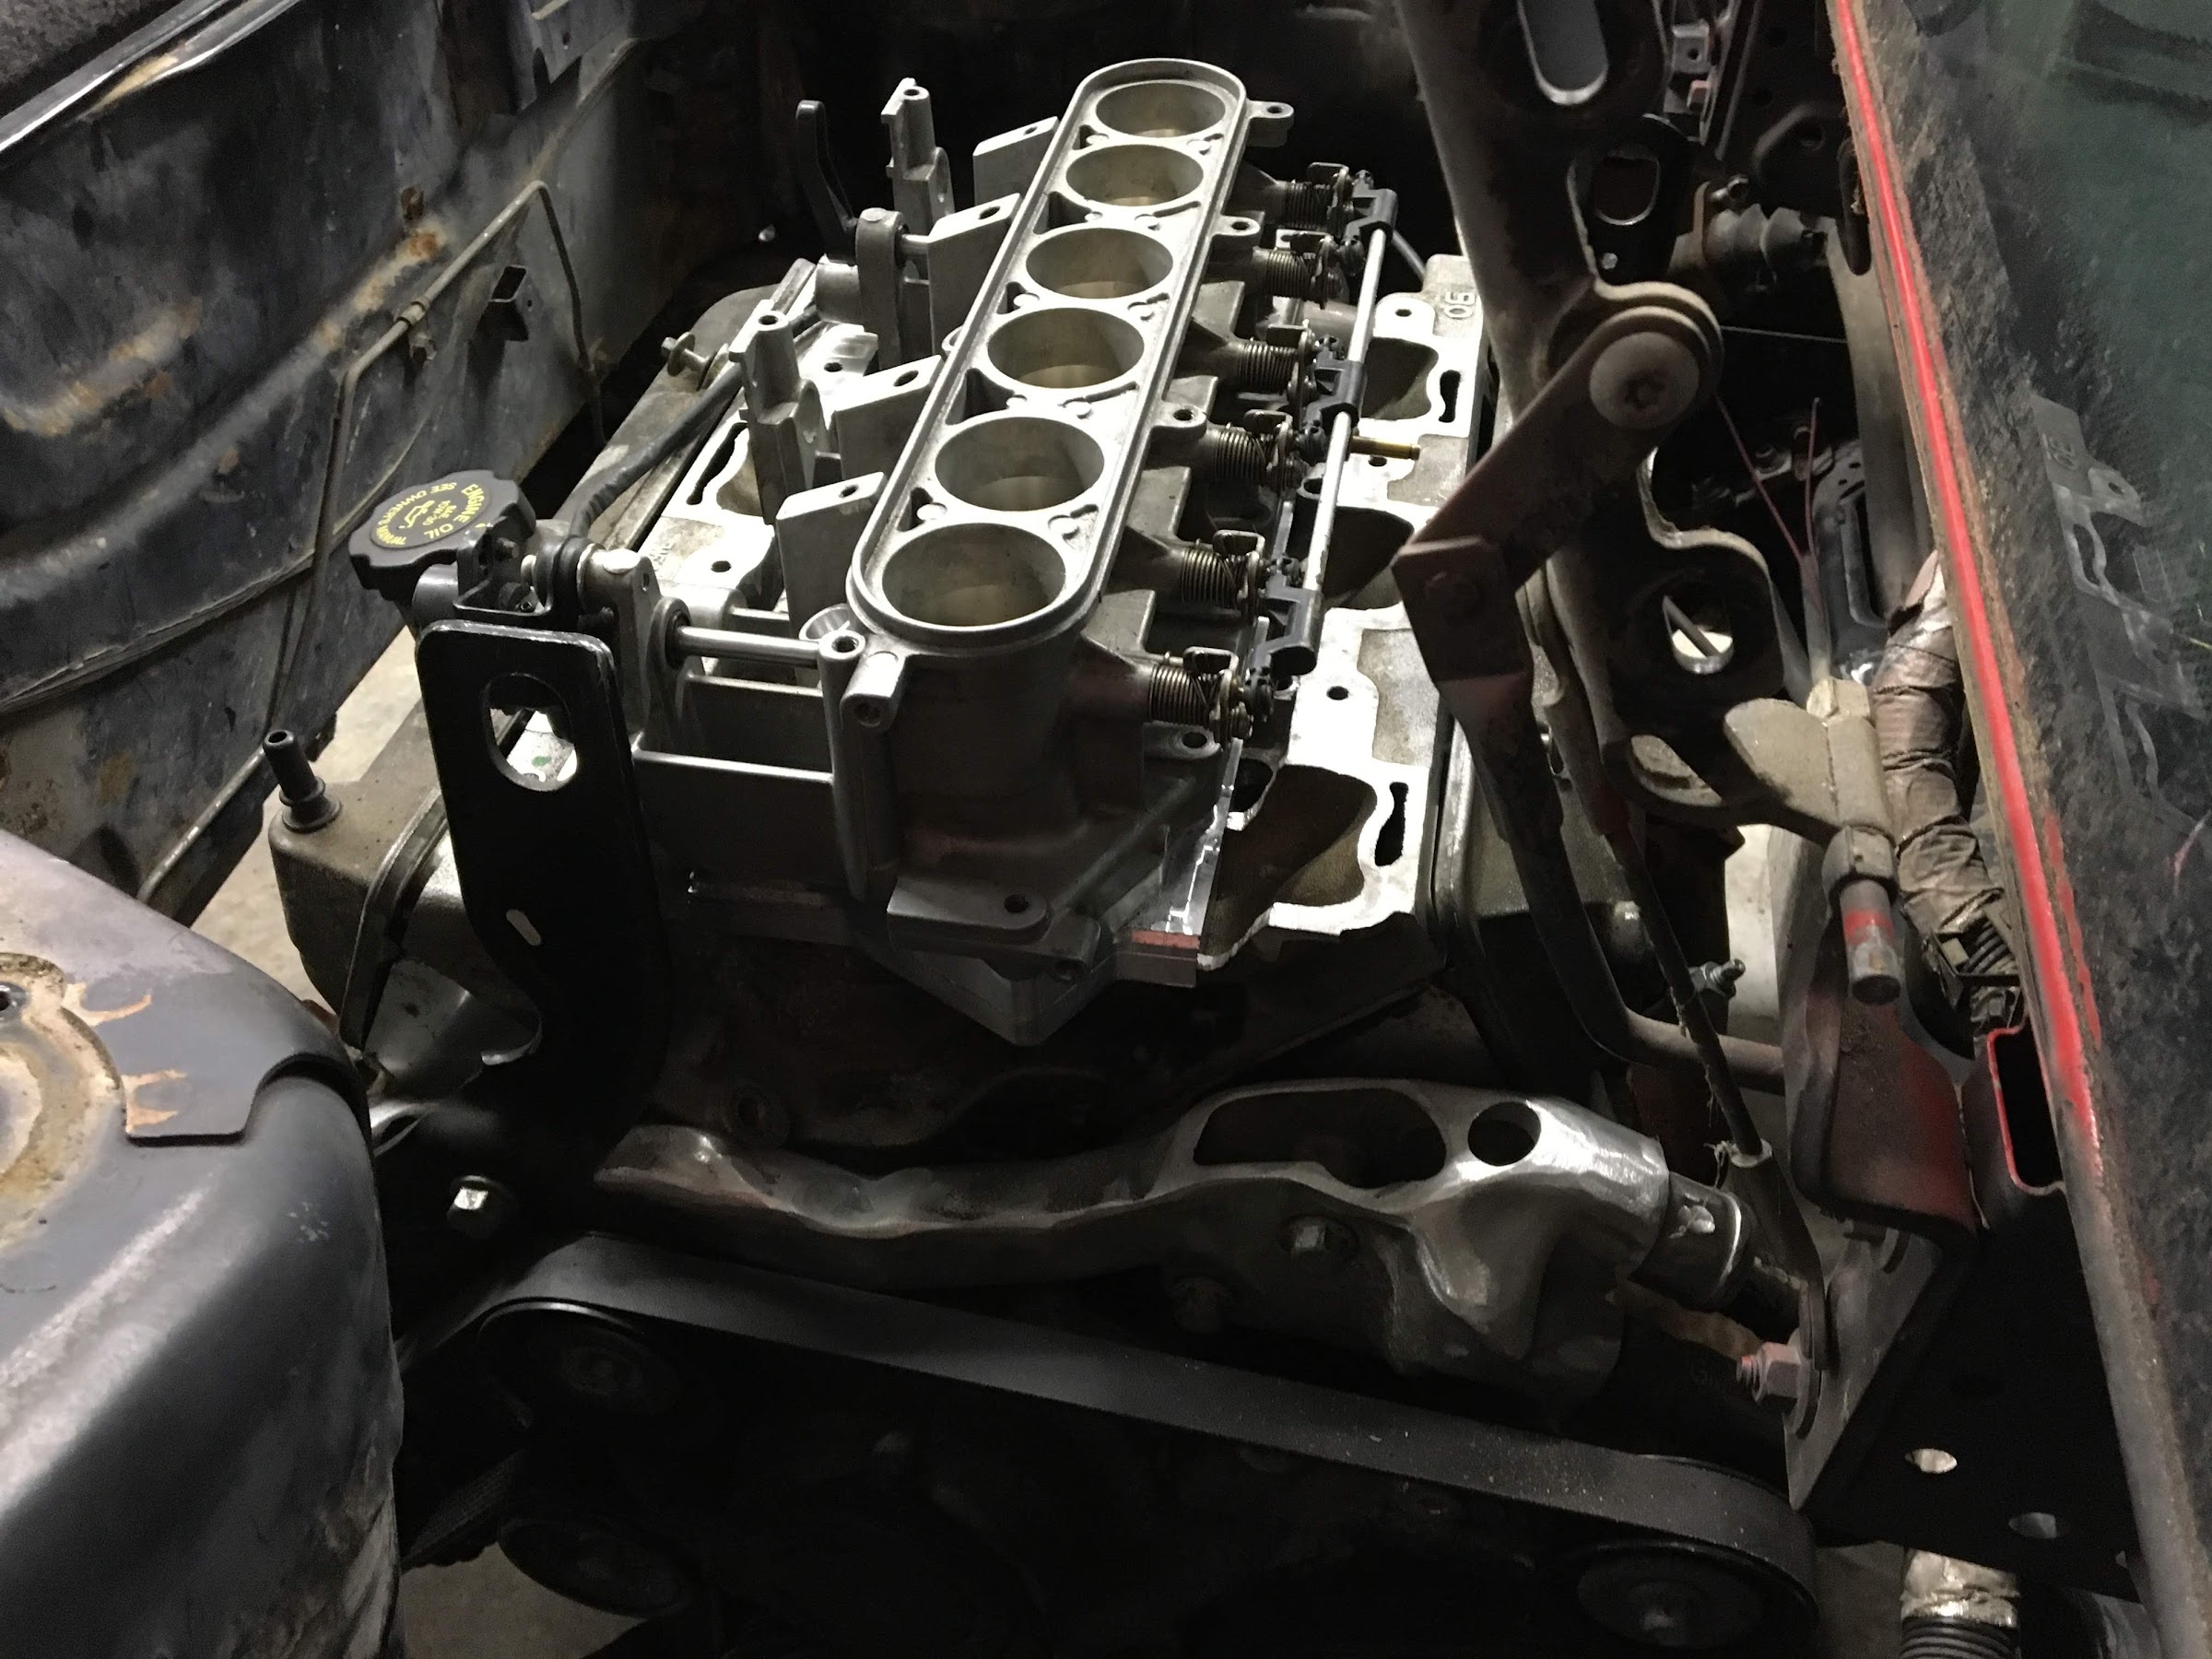
As you all will begin to know about me I don't do things the same as other people, and honestly if its not unique and different I really struggle to keep motivation to get it done... So in came the crazy idea:

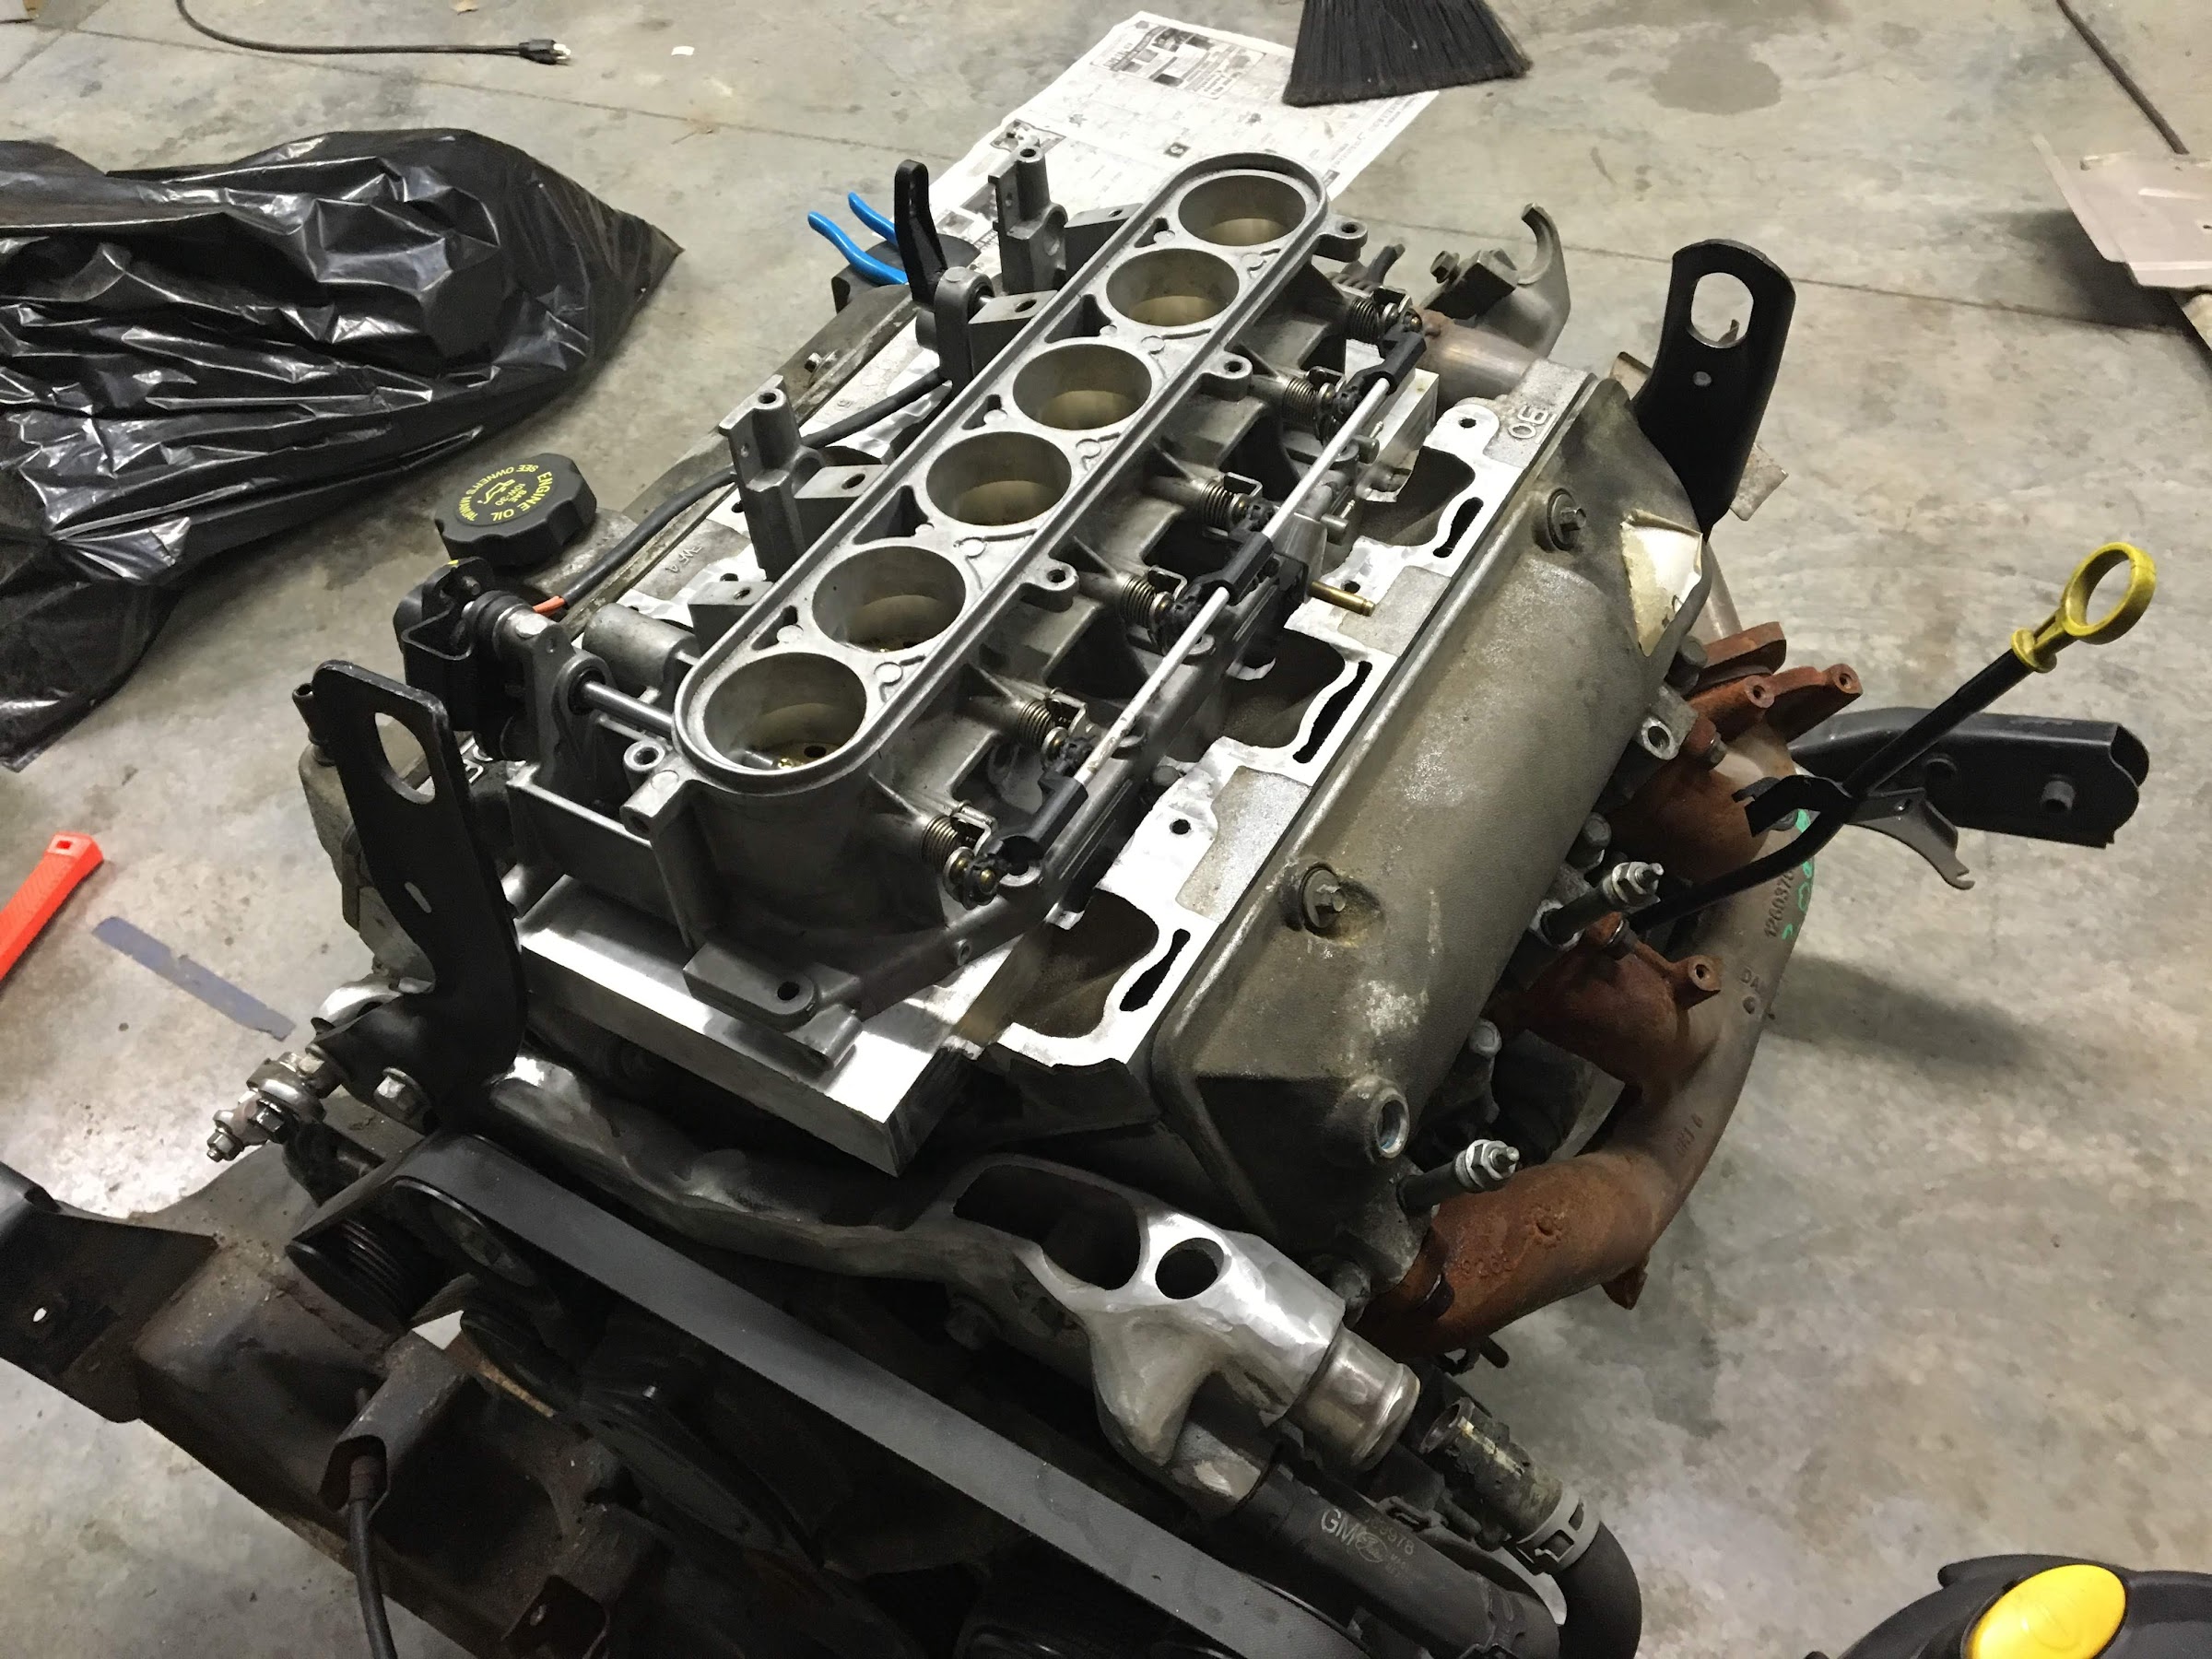
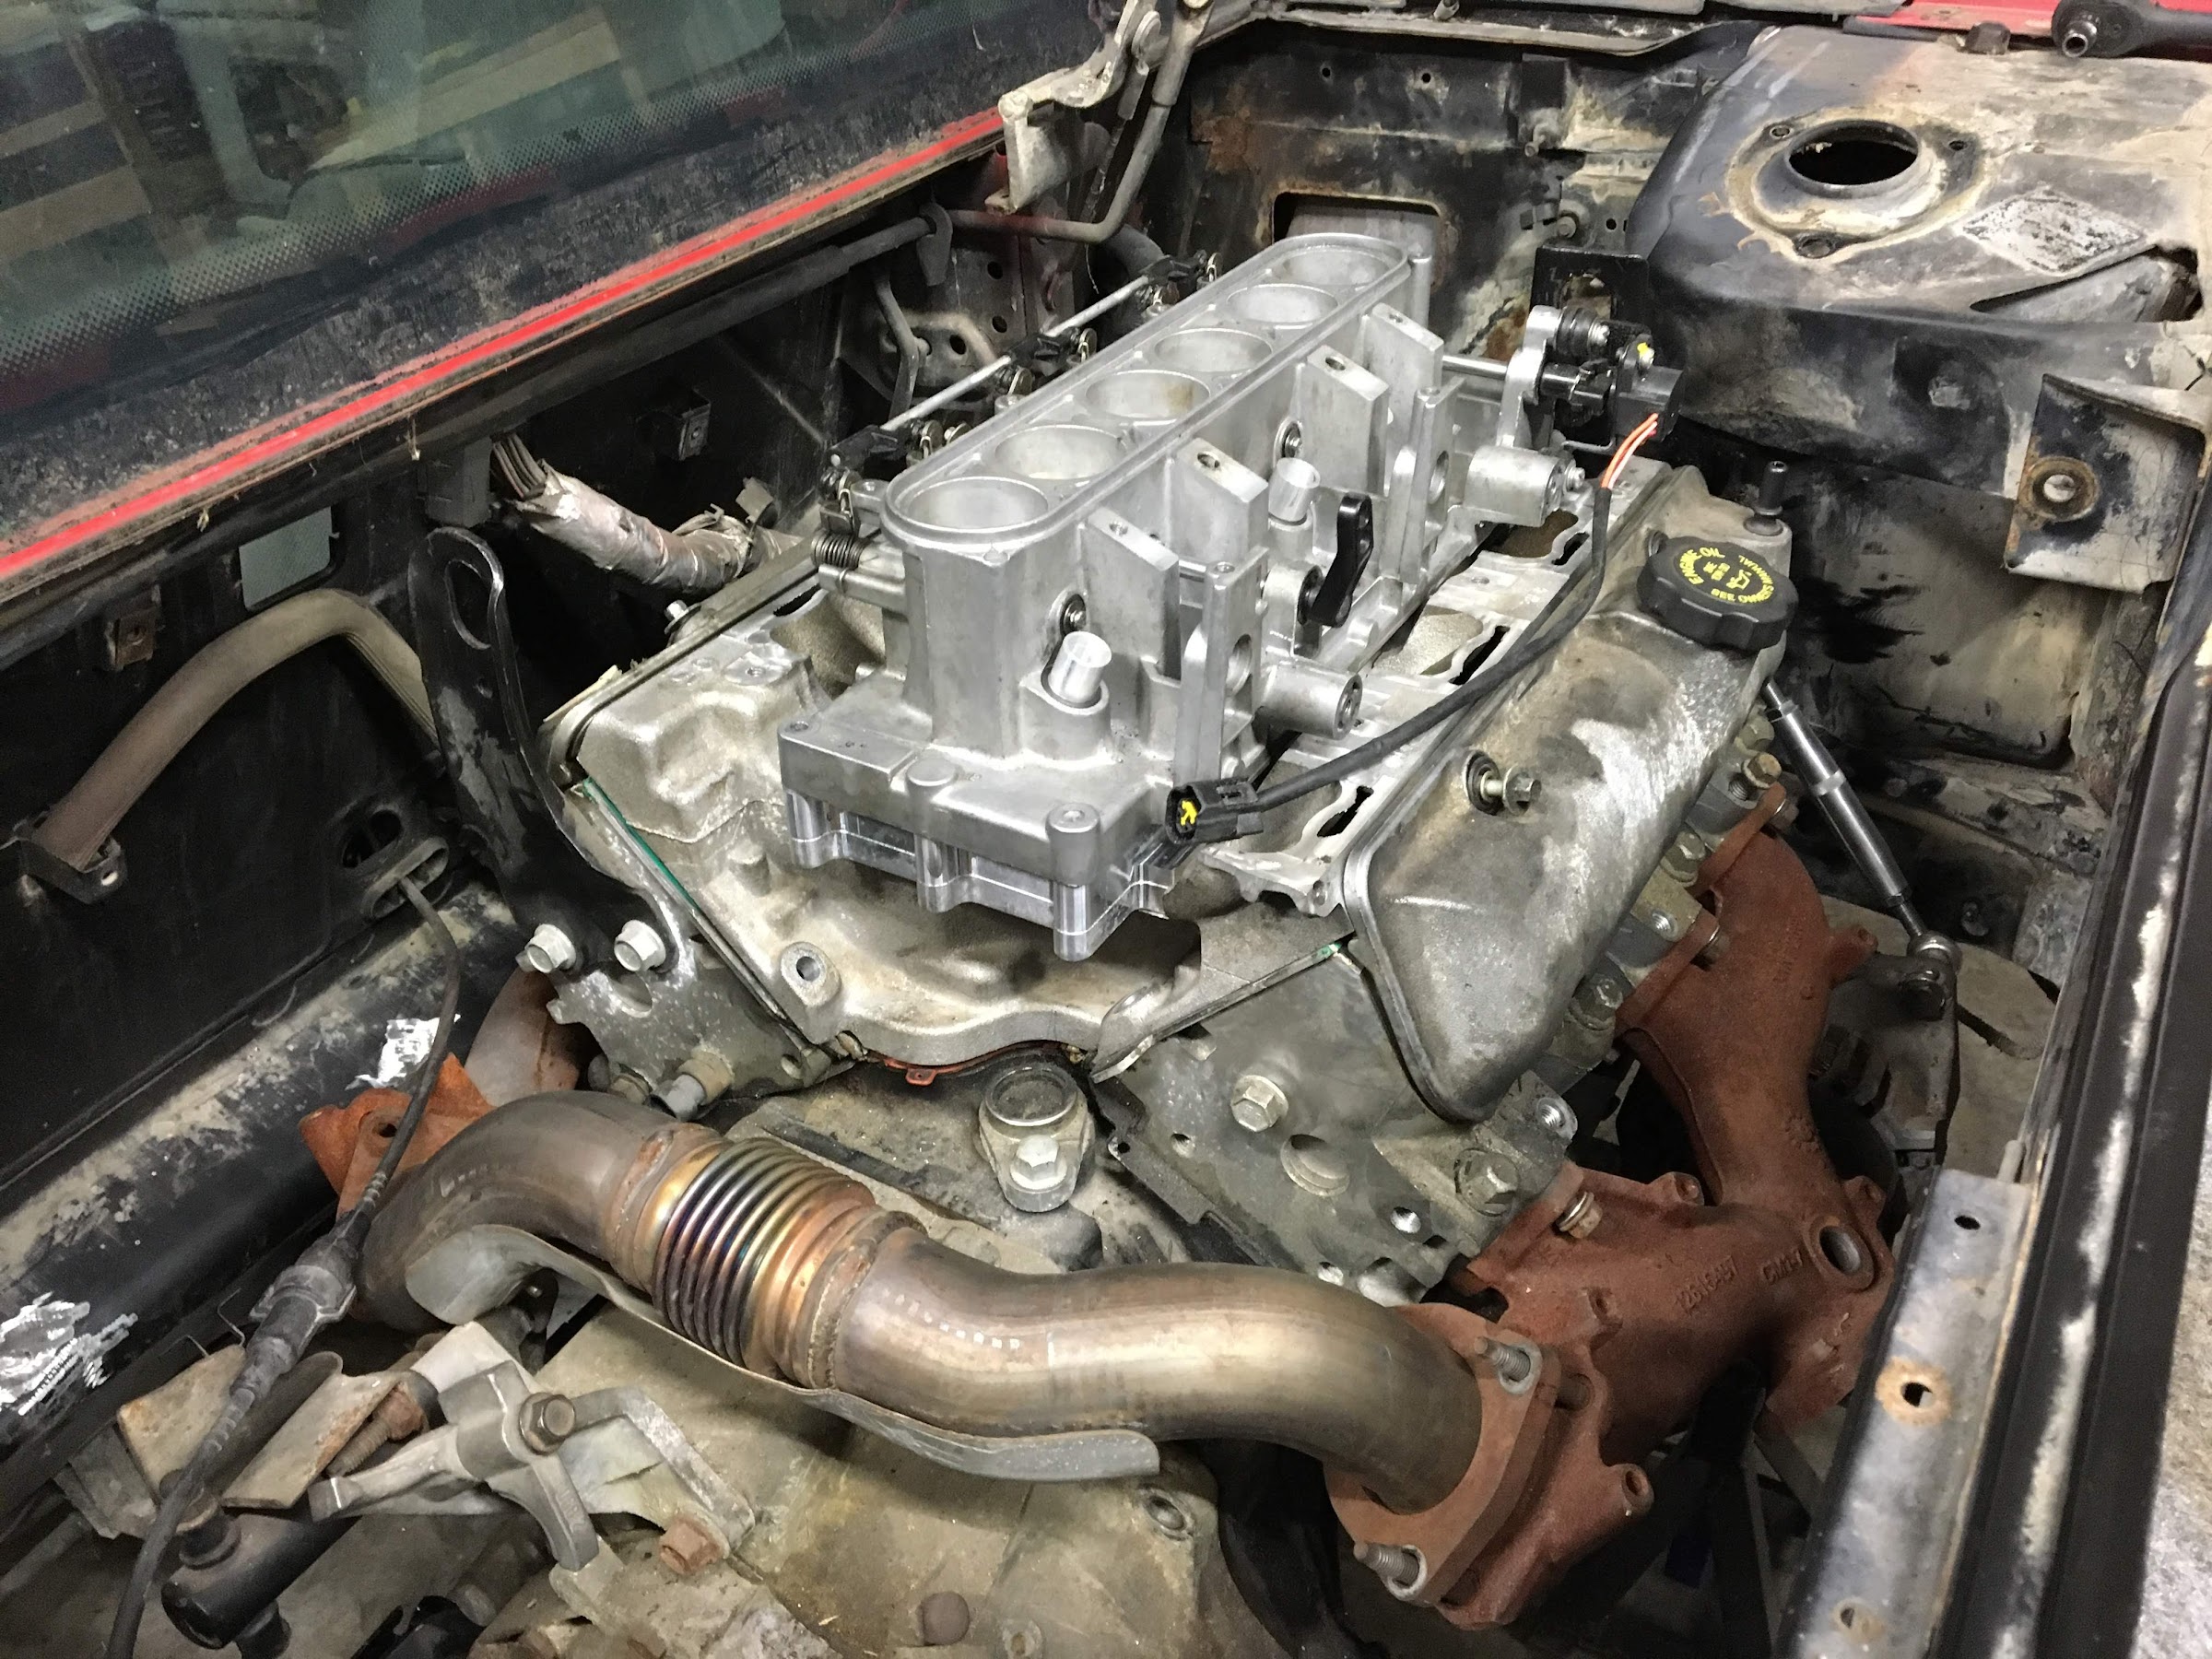
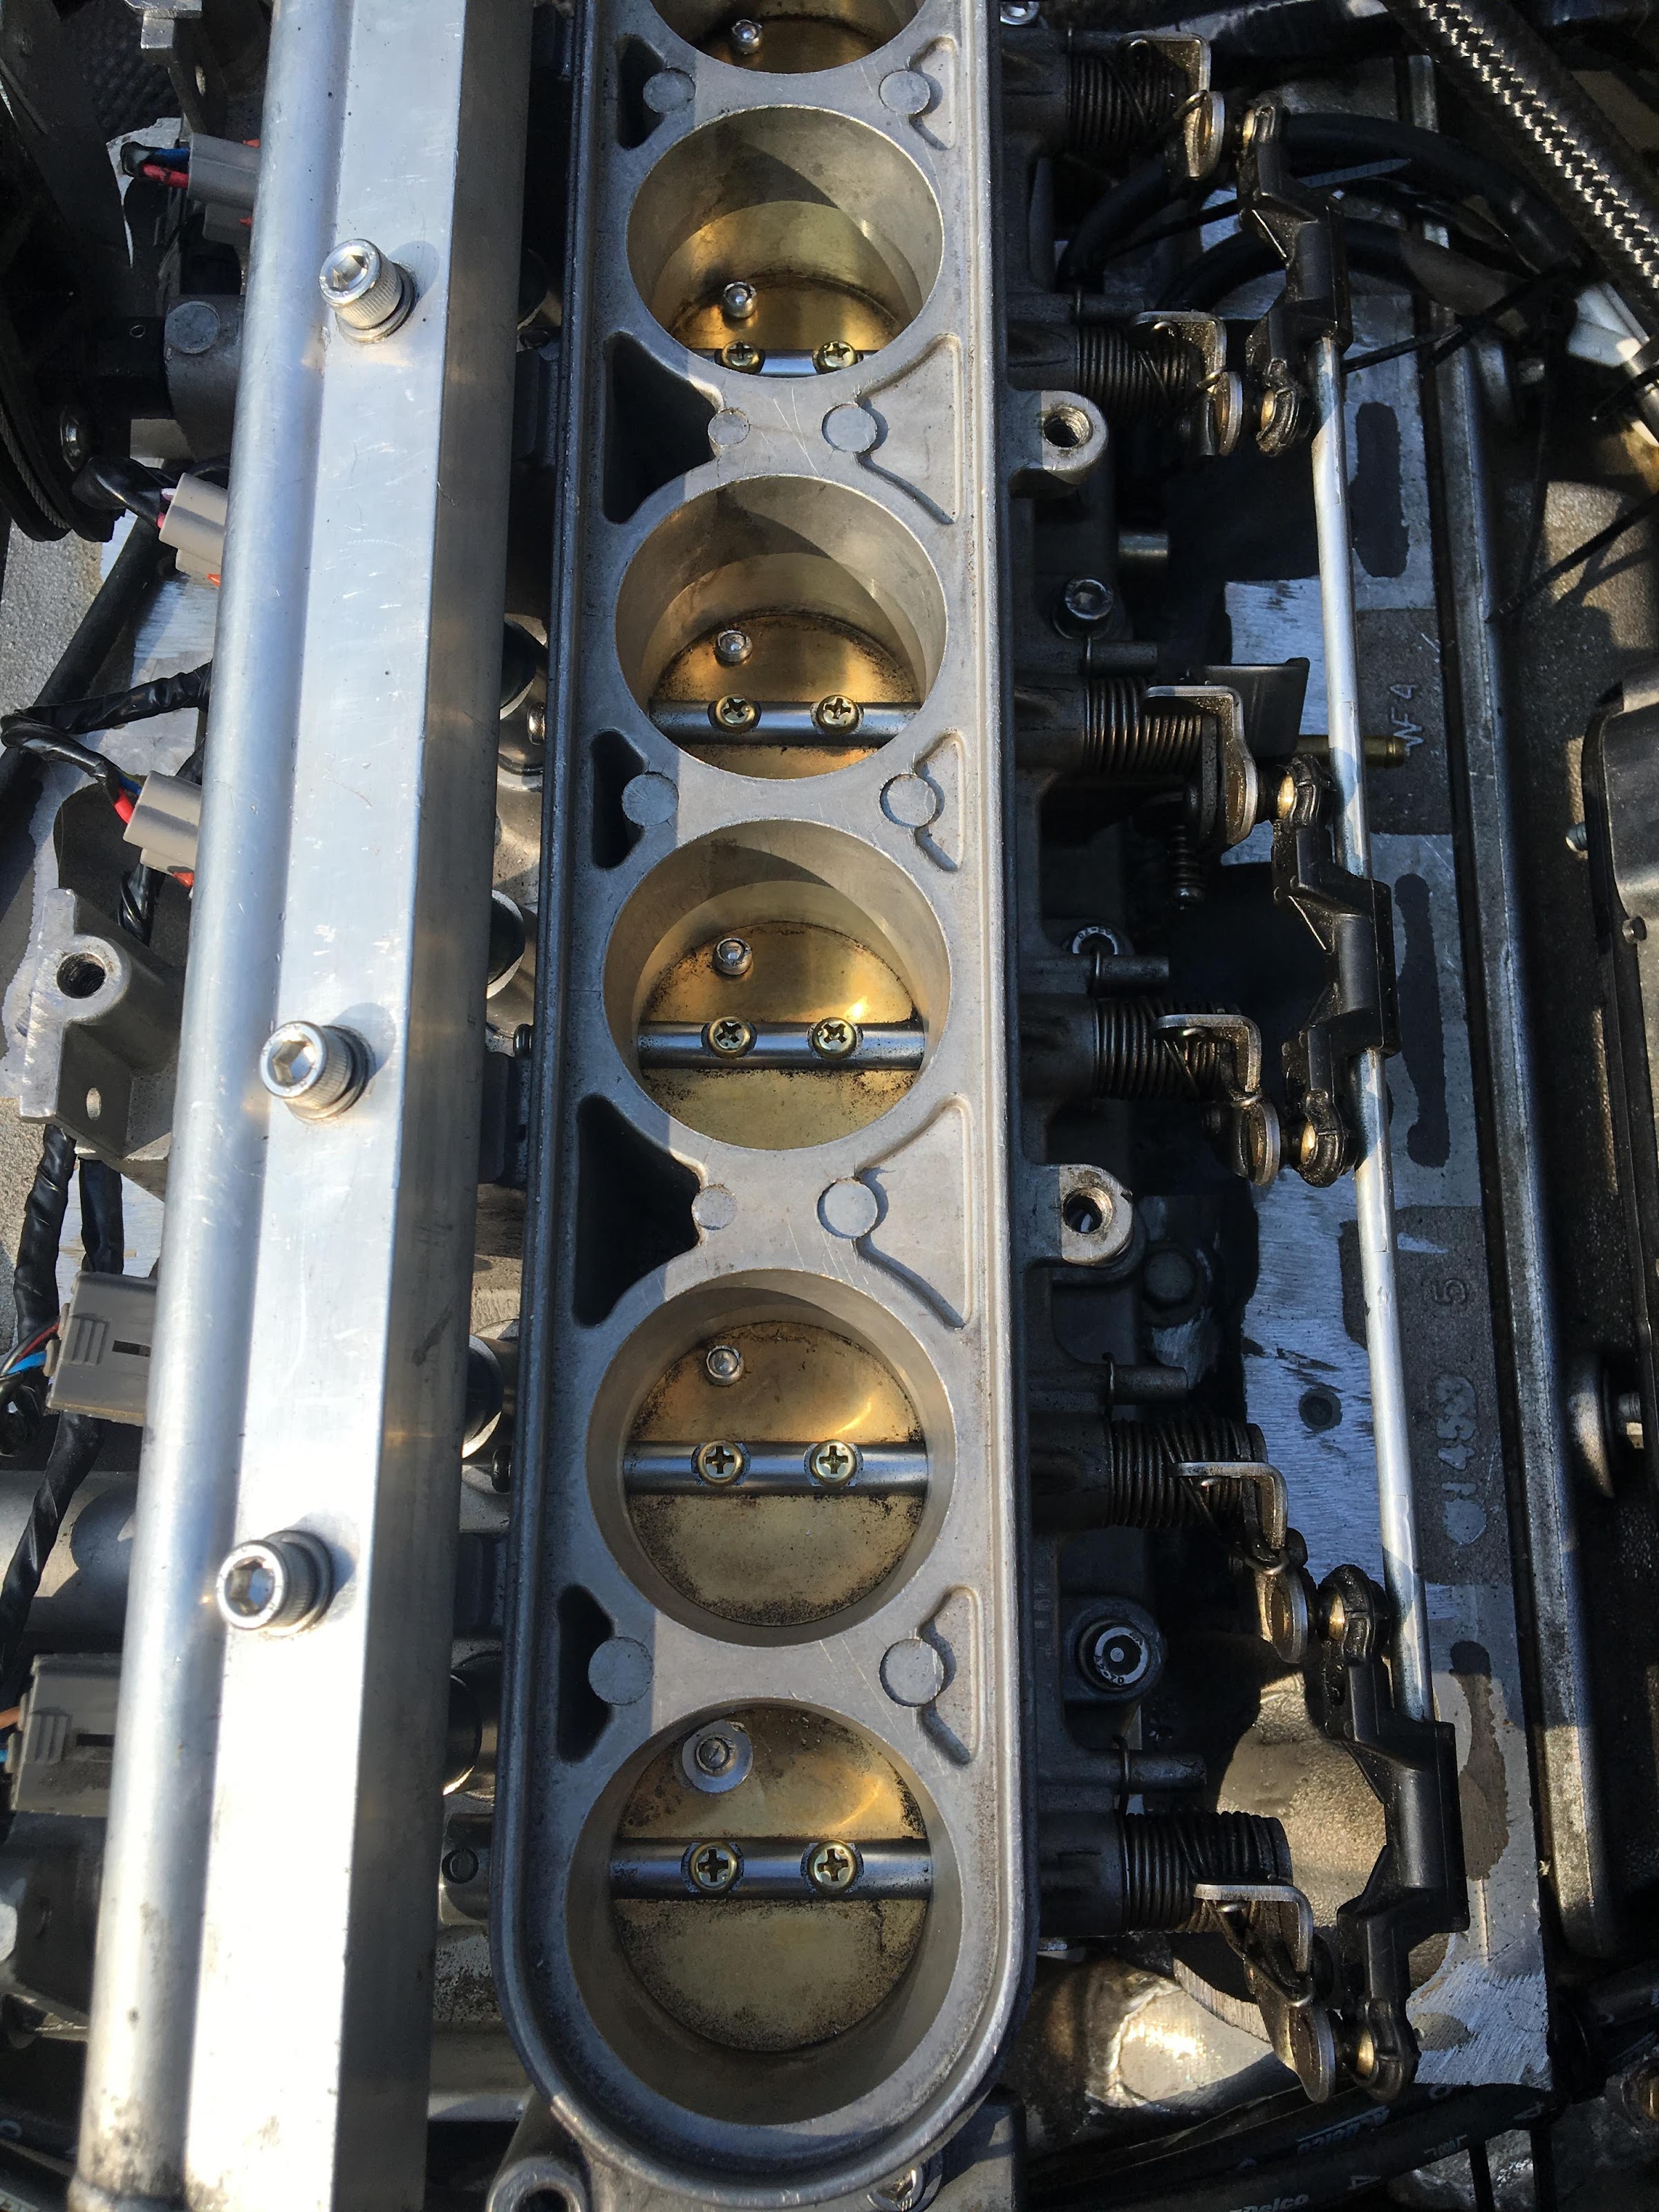
Now the motivation was back! I had picked up years ago, for project just like this, a throttle body assembly from a Yamaha V-Max outboard 2 stroke v6. Now the unique part that worked in my favor was the throttle body spacing almost matched the 3900 cylinder spacing in the lower intake manifold perfectly!
A quick test fit and things were looking good:

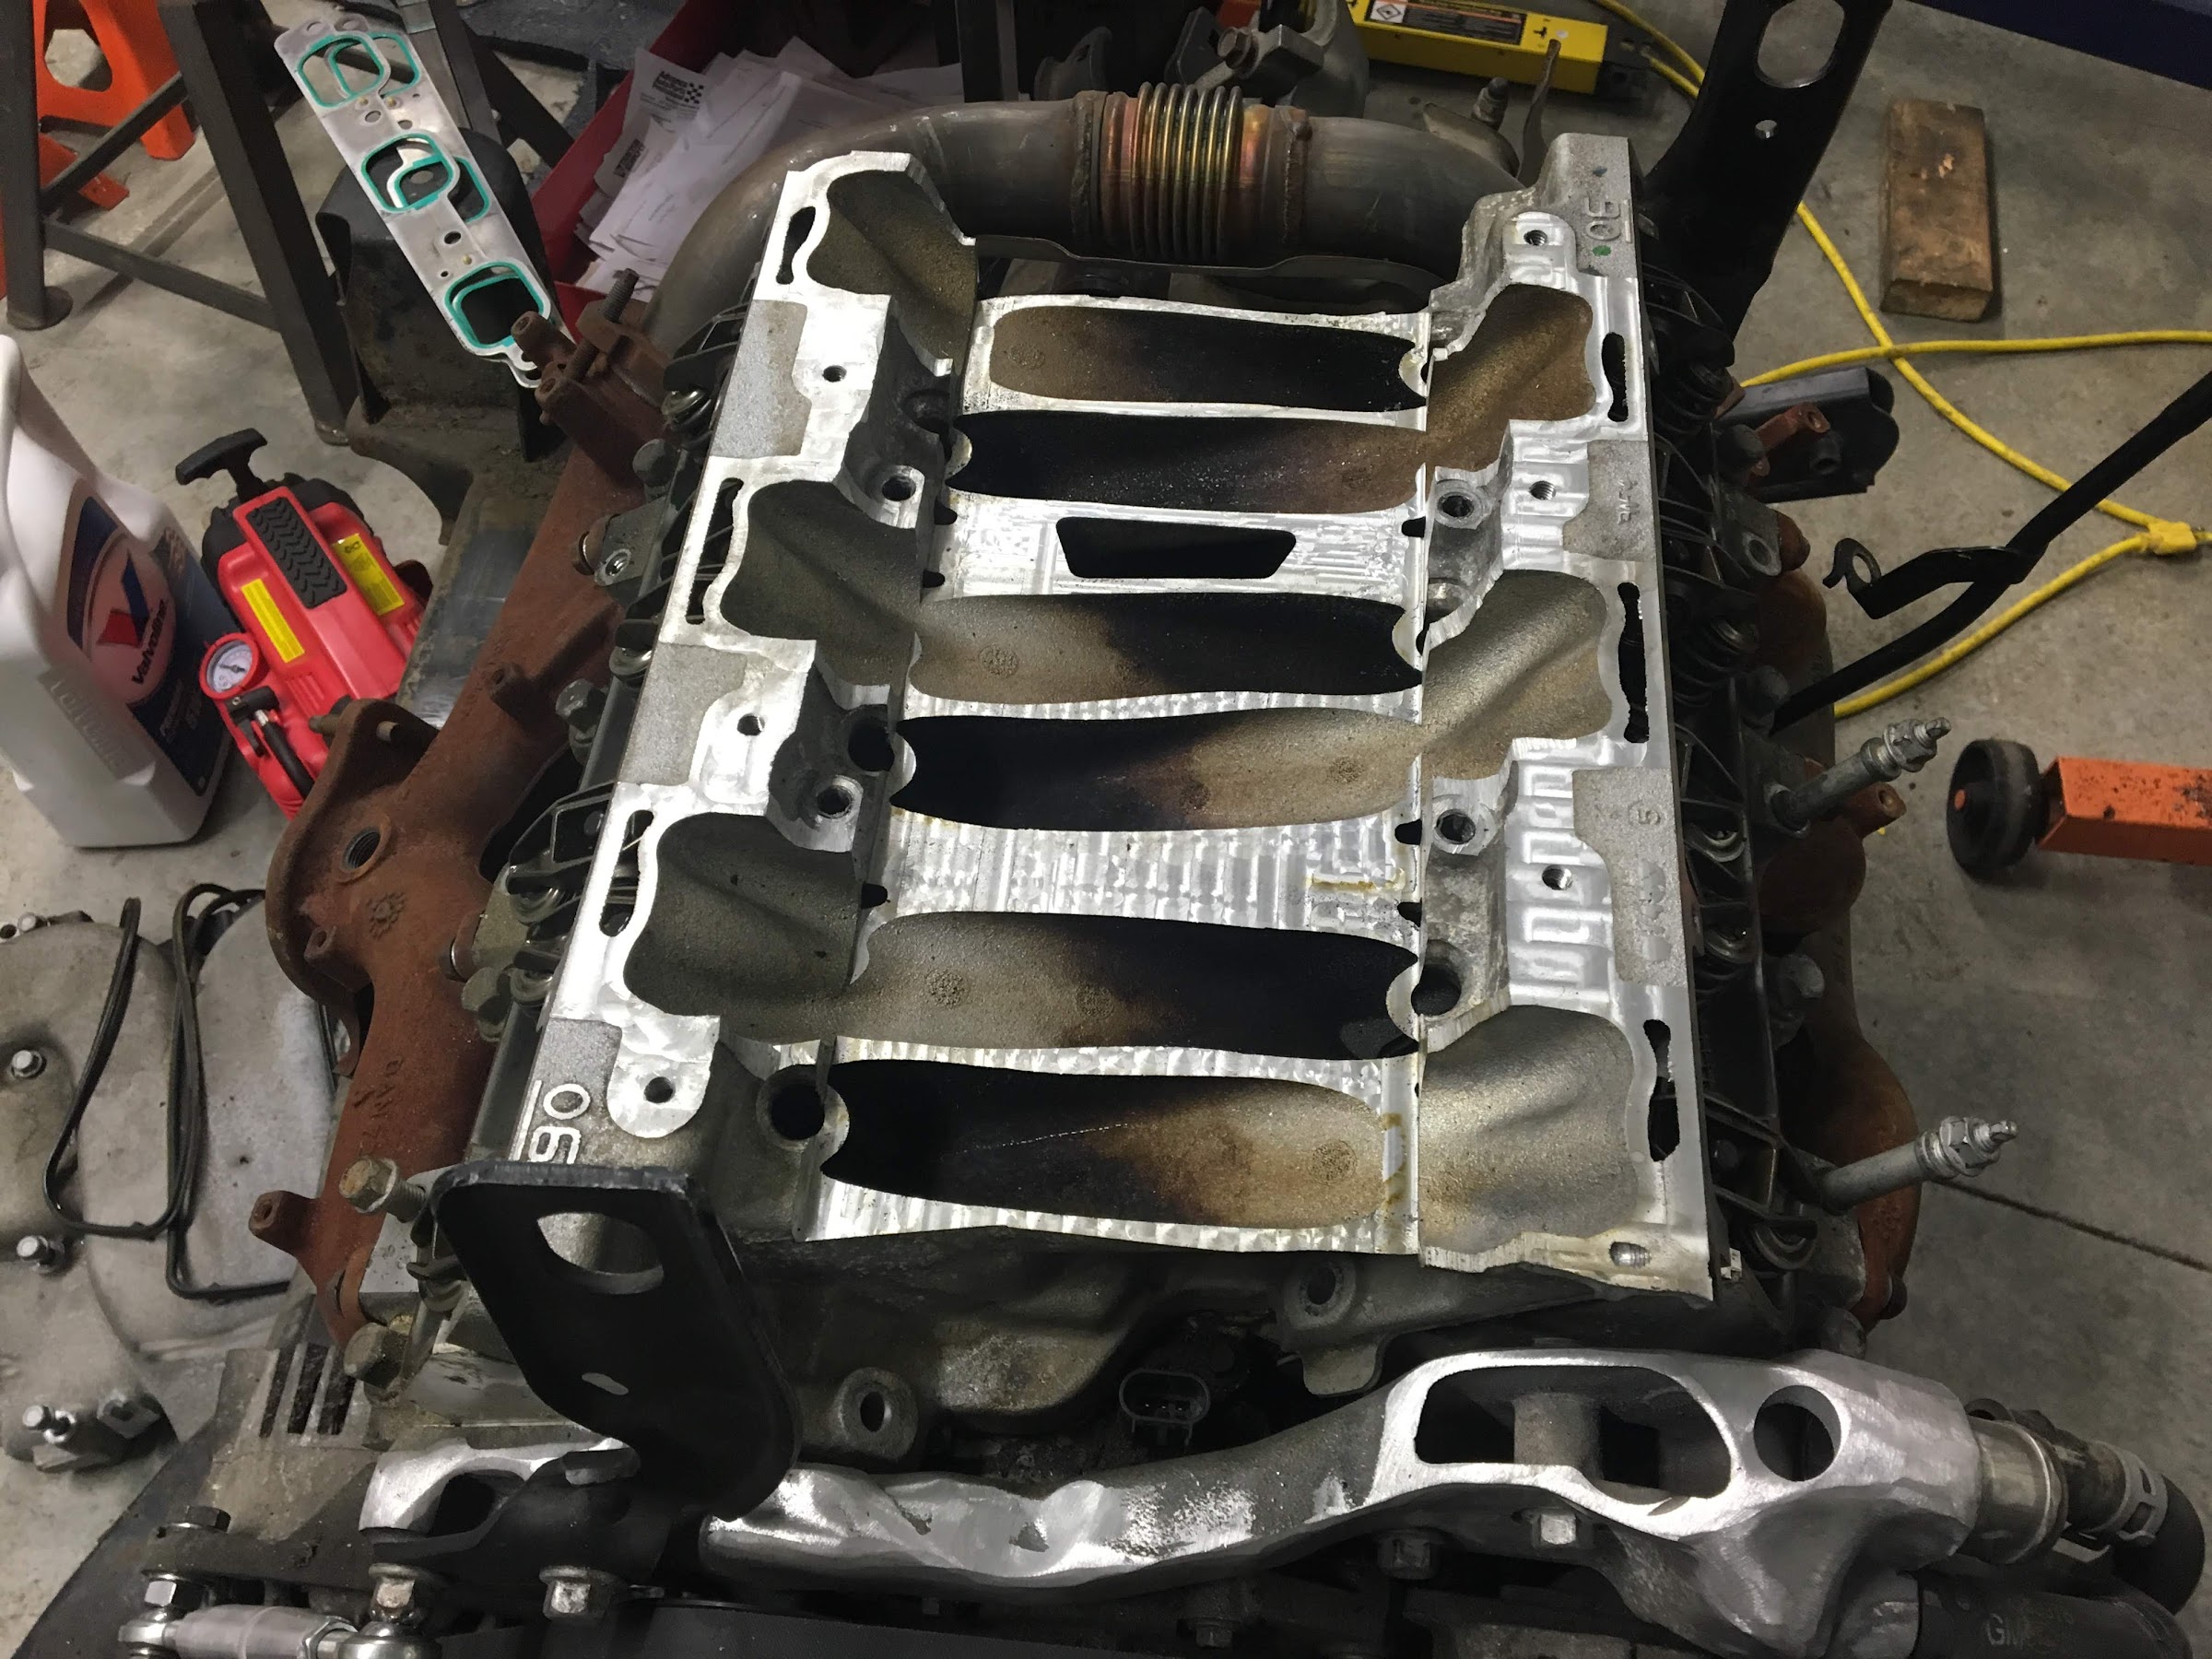
This process did require destroying a lower intake manifold to get low engine to have the intake ports in the right spots and enough clearance for the trunk to close:

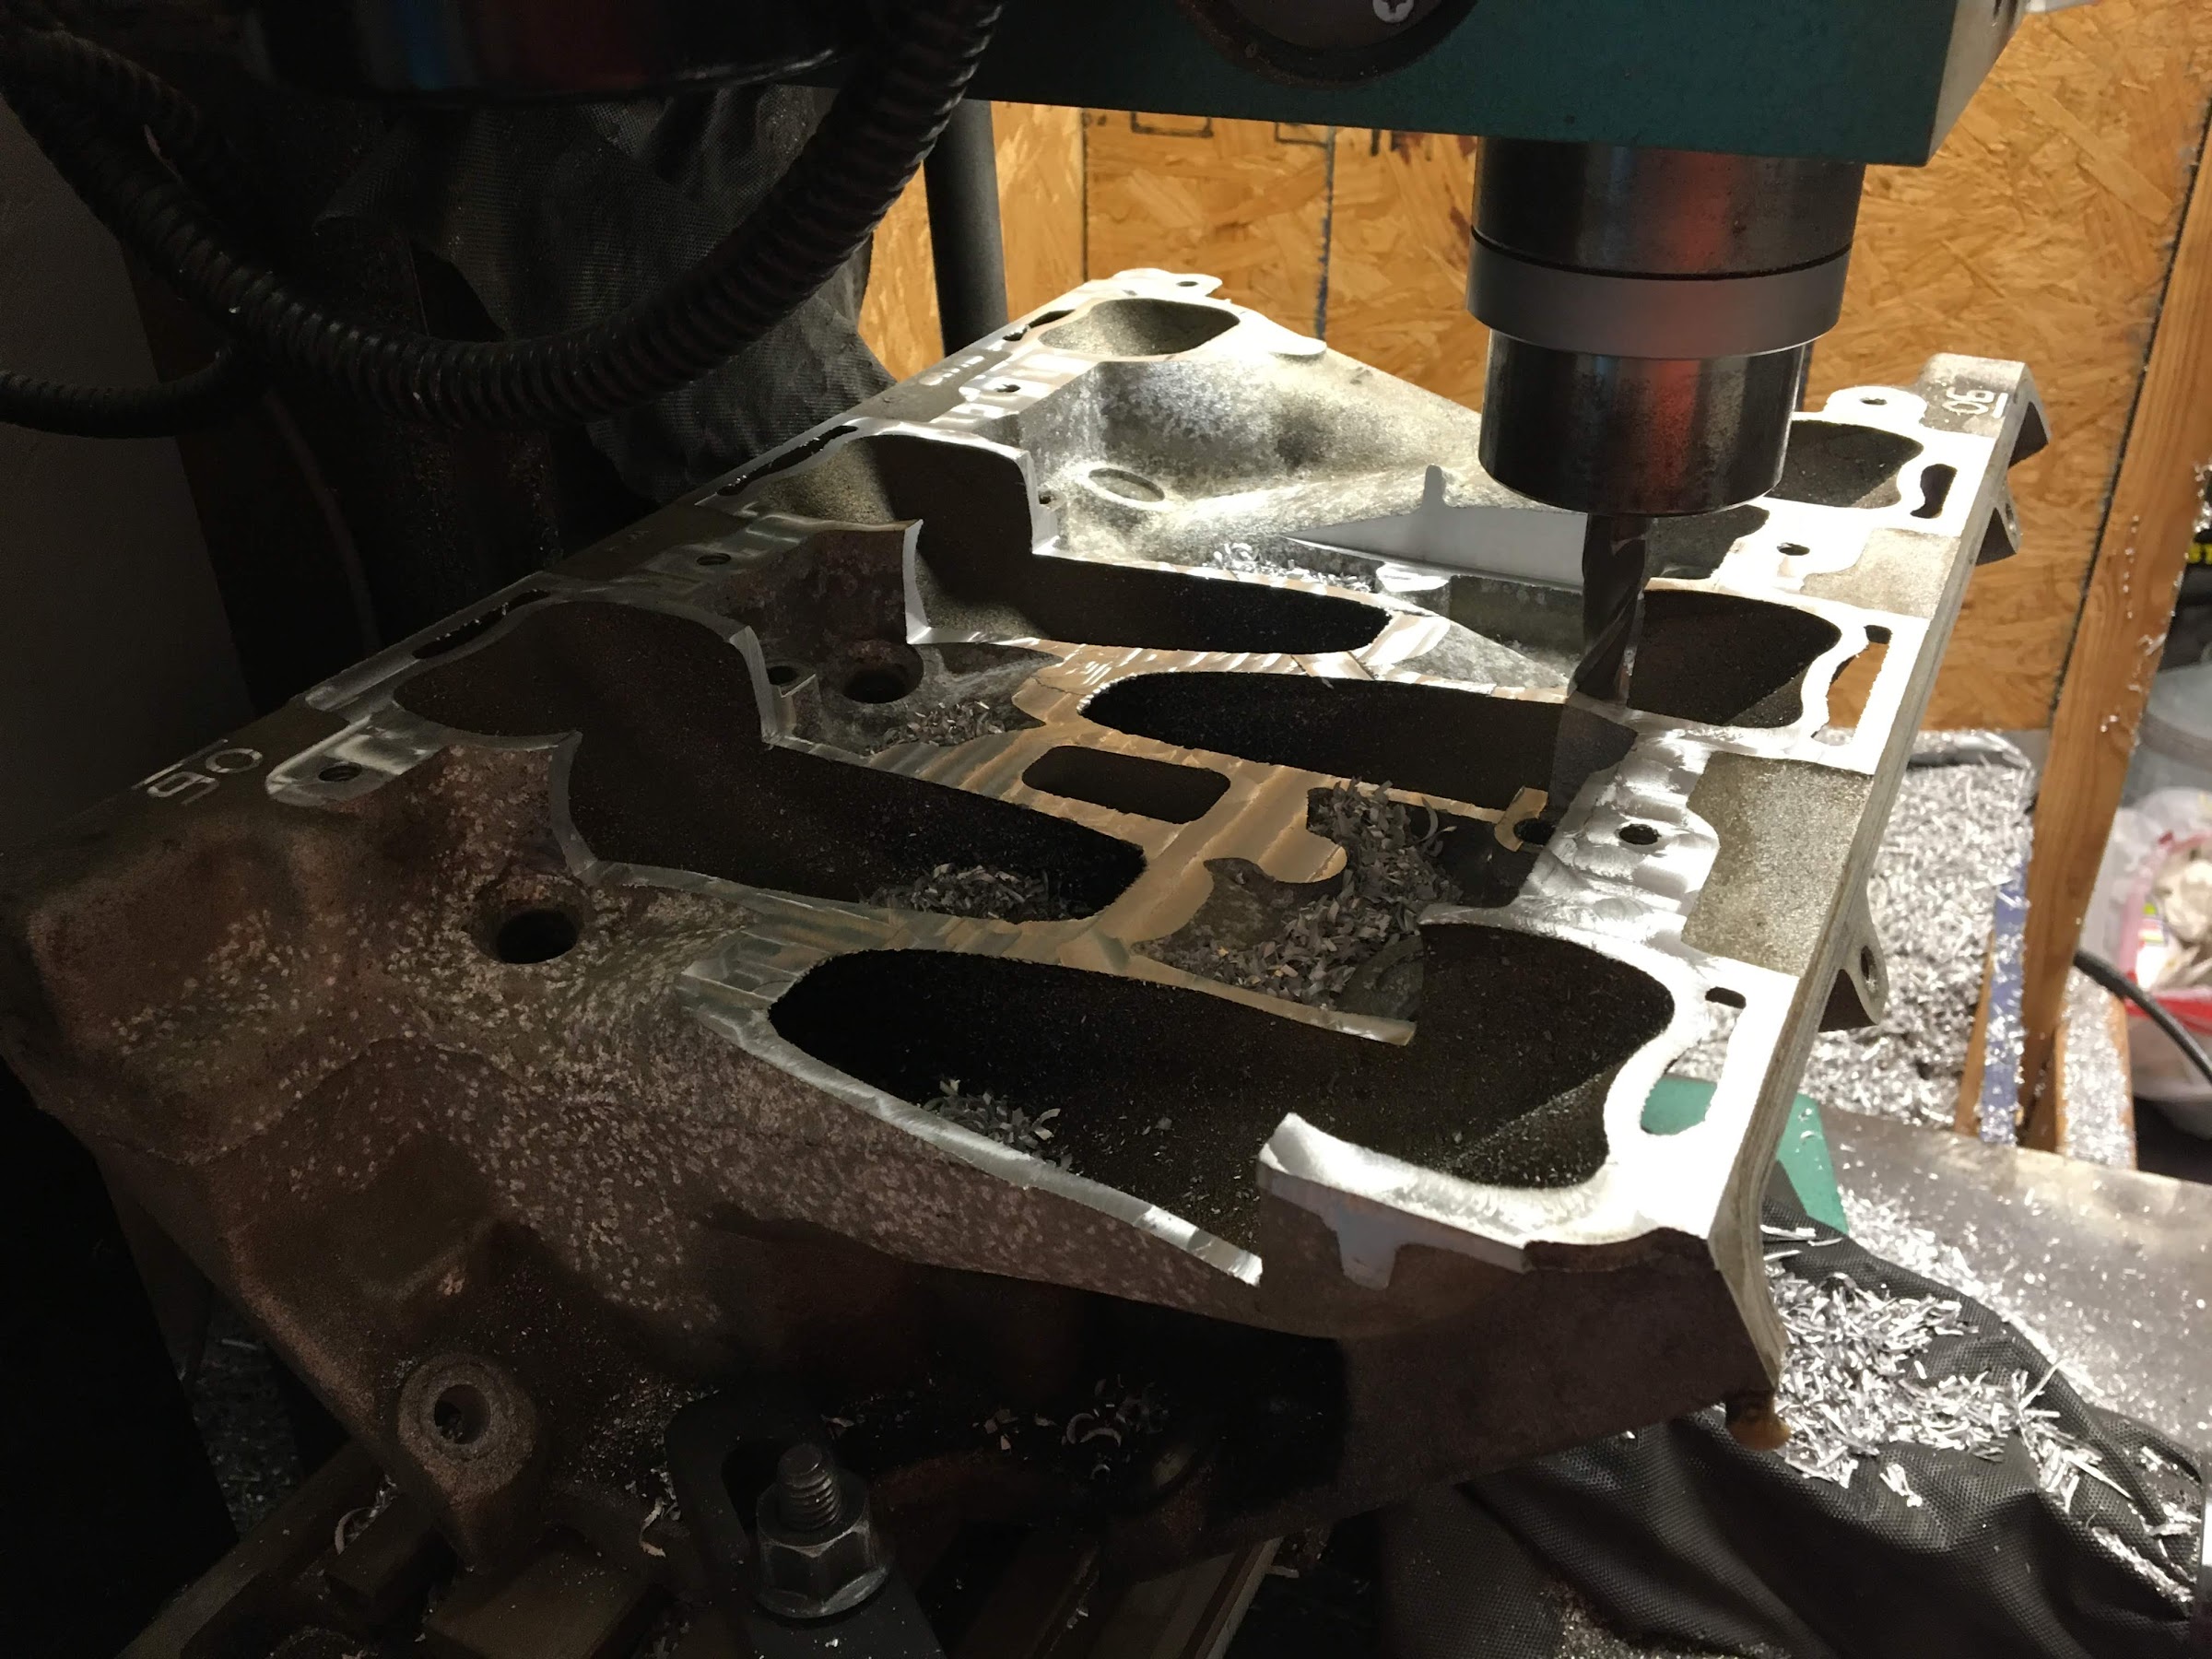
With that cut out enough to have a plate slip in to form my transitions I began milling the adapter:
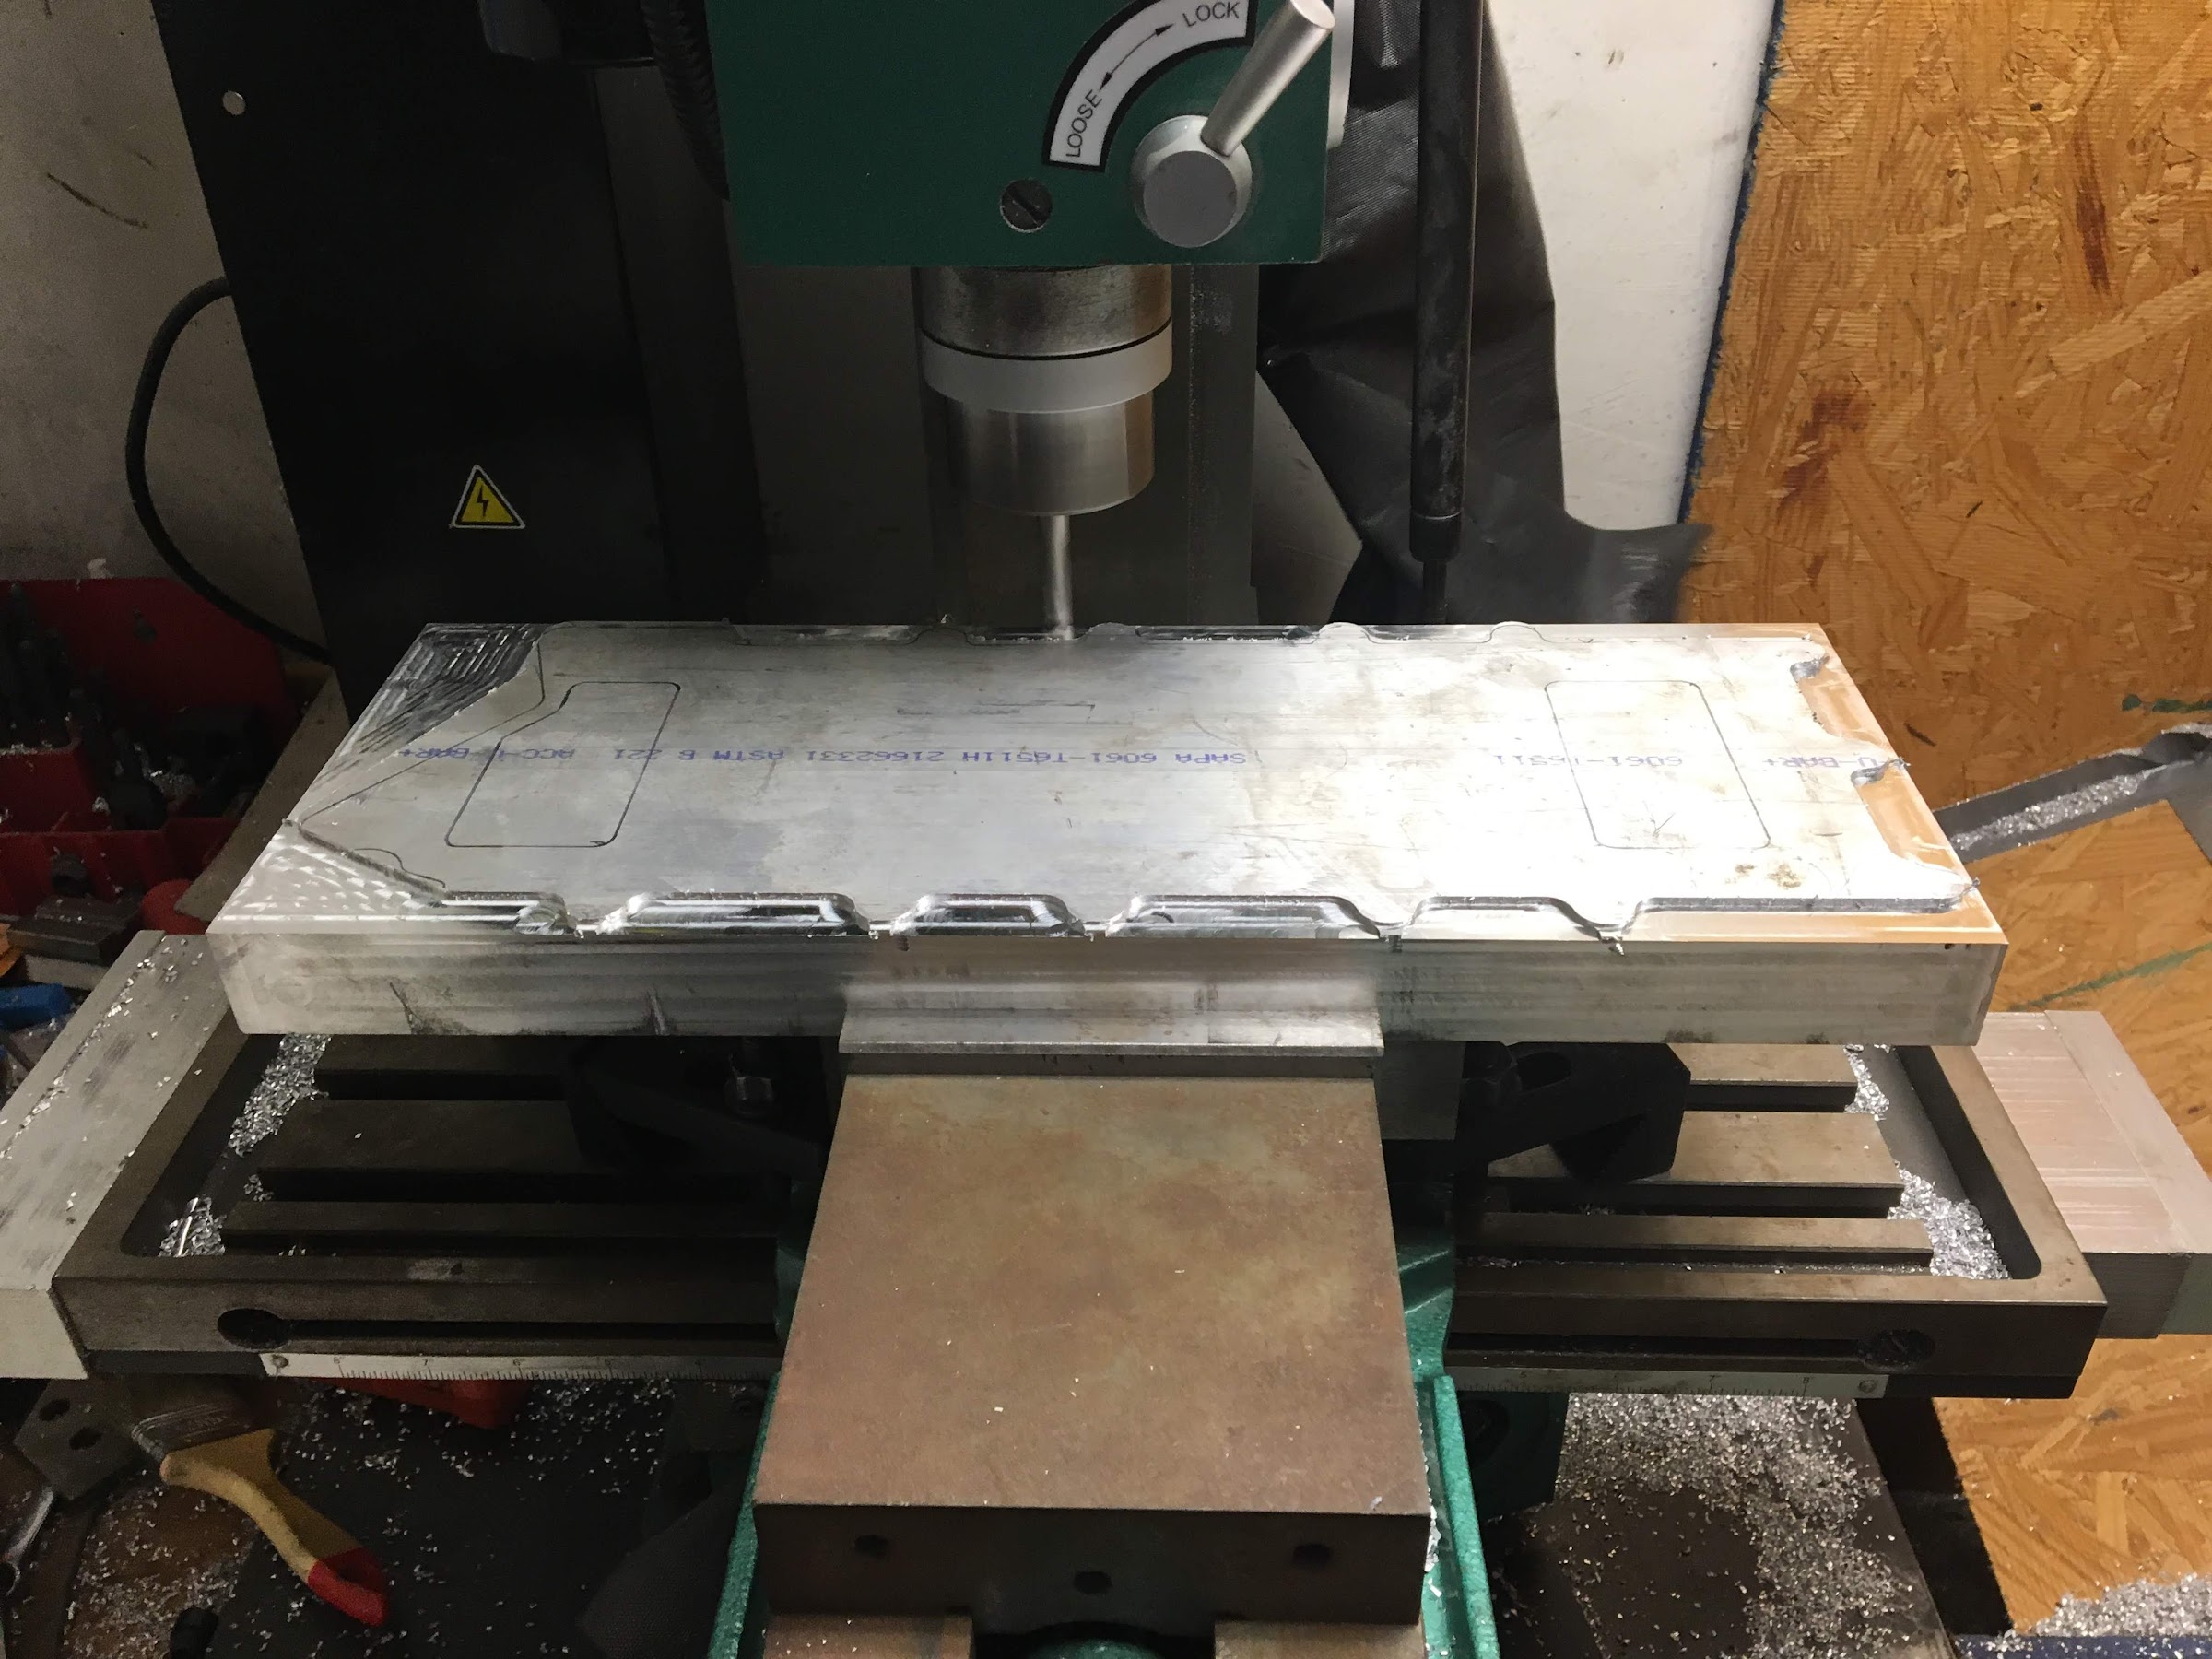
Matching it to the gasket for the throttle bodies:
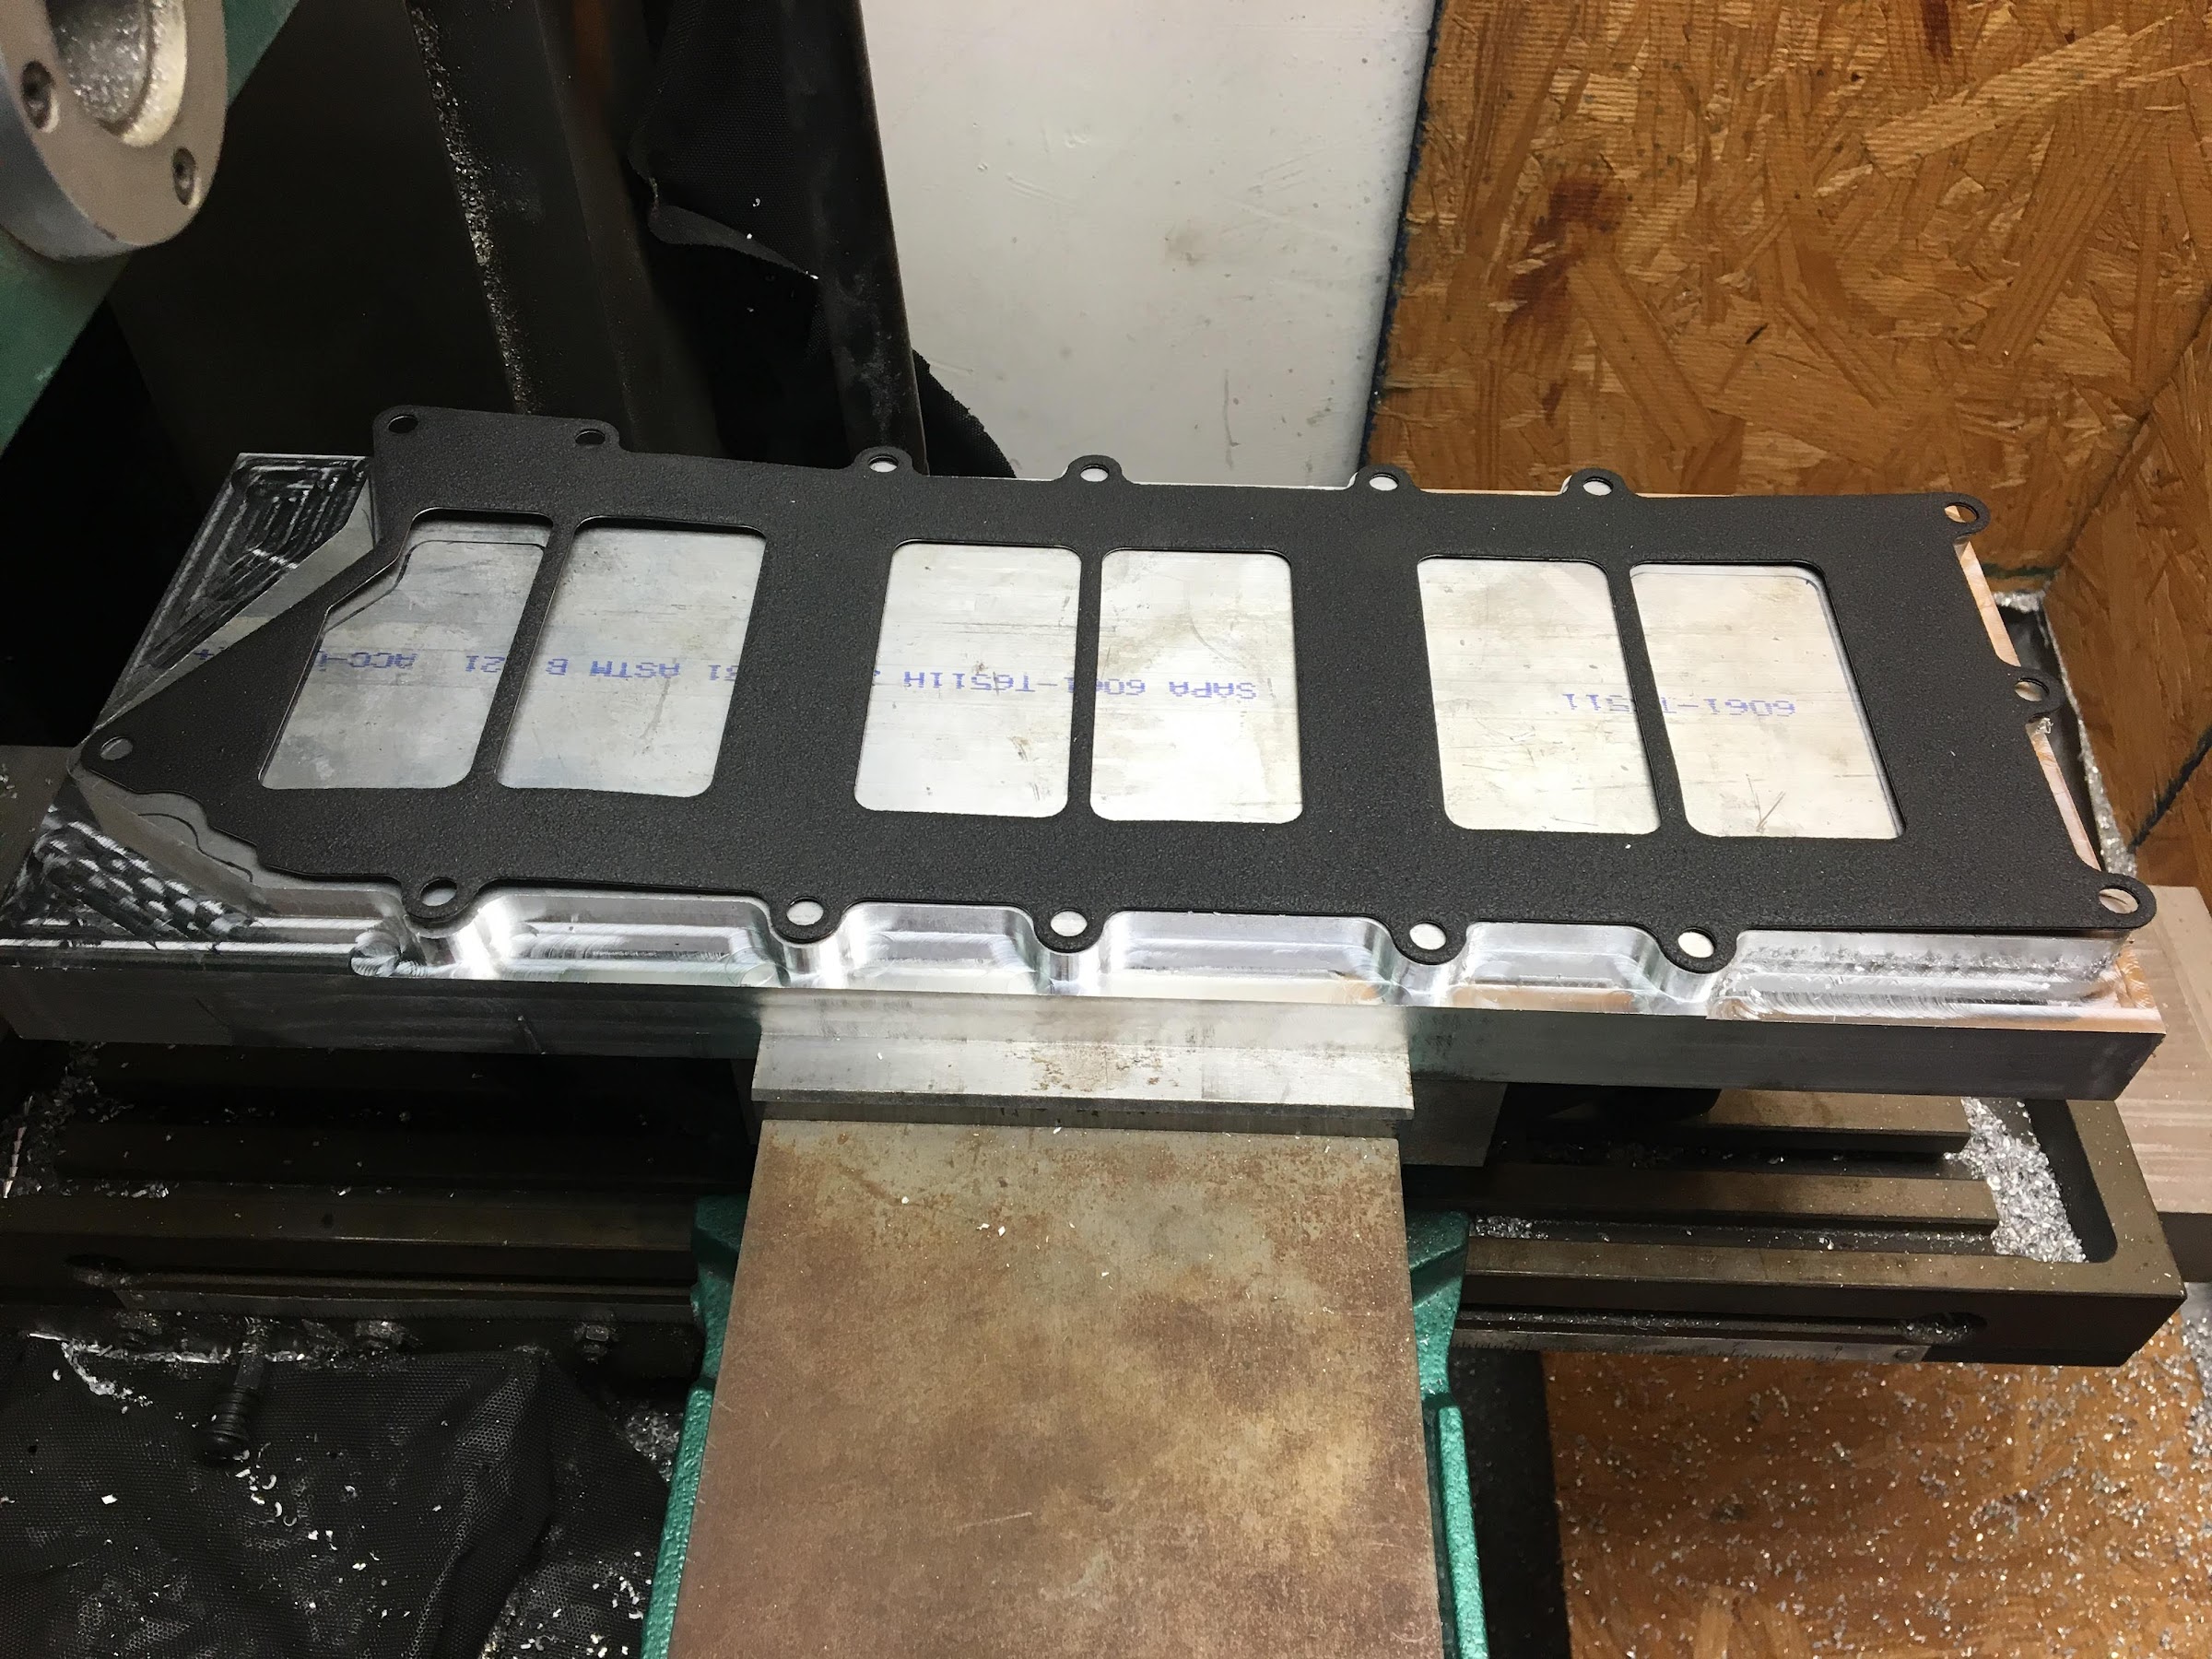
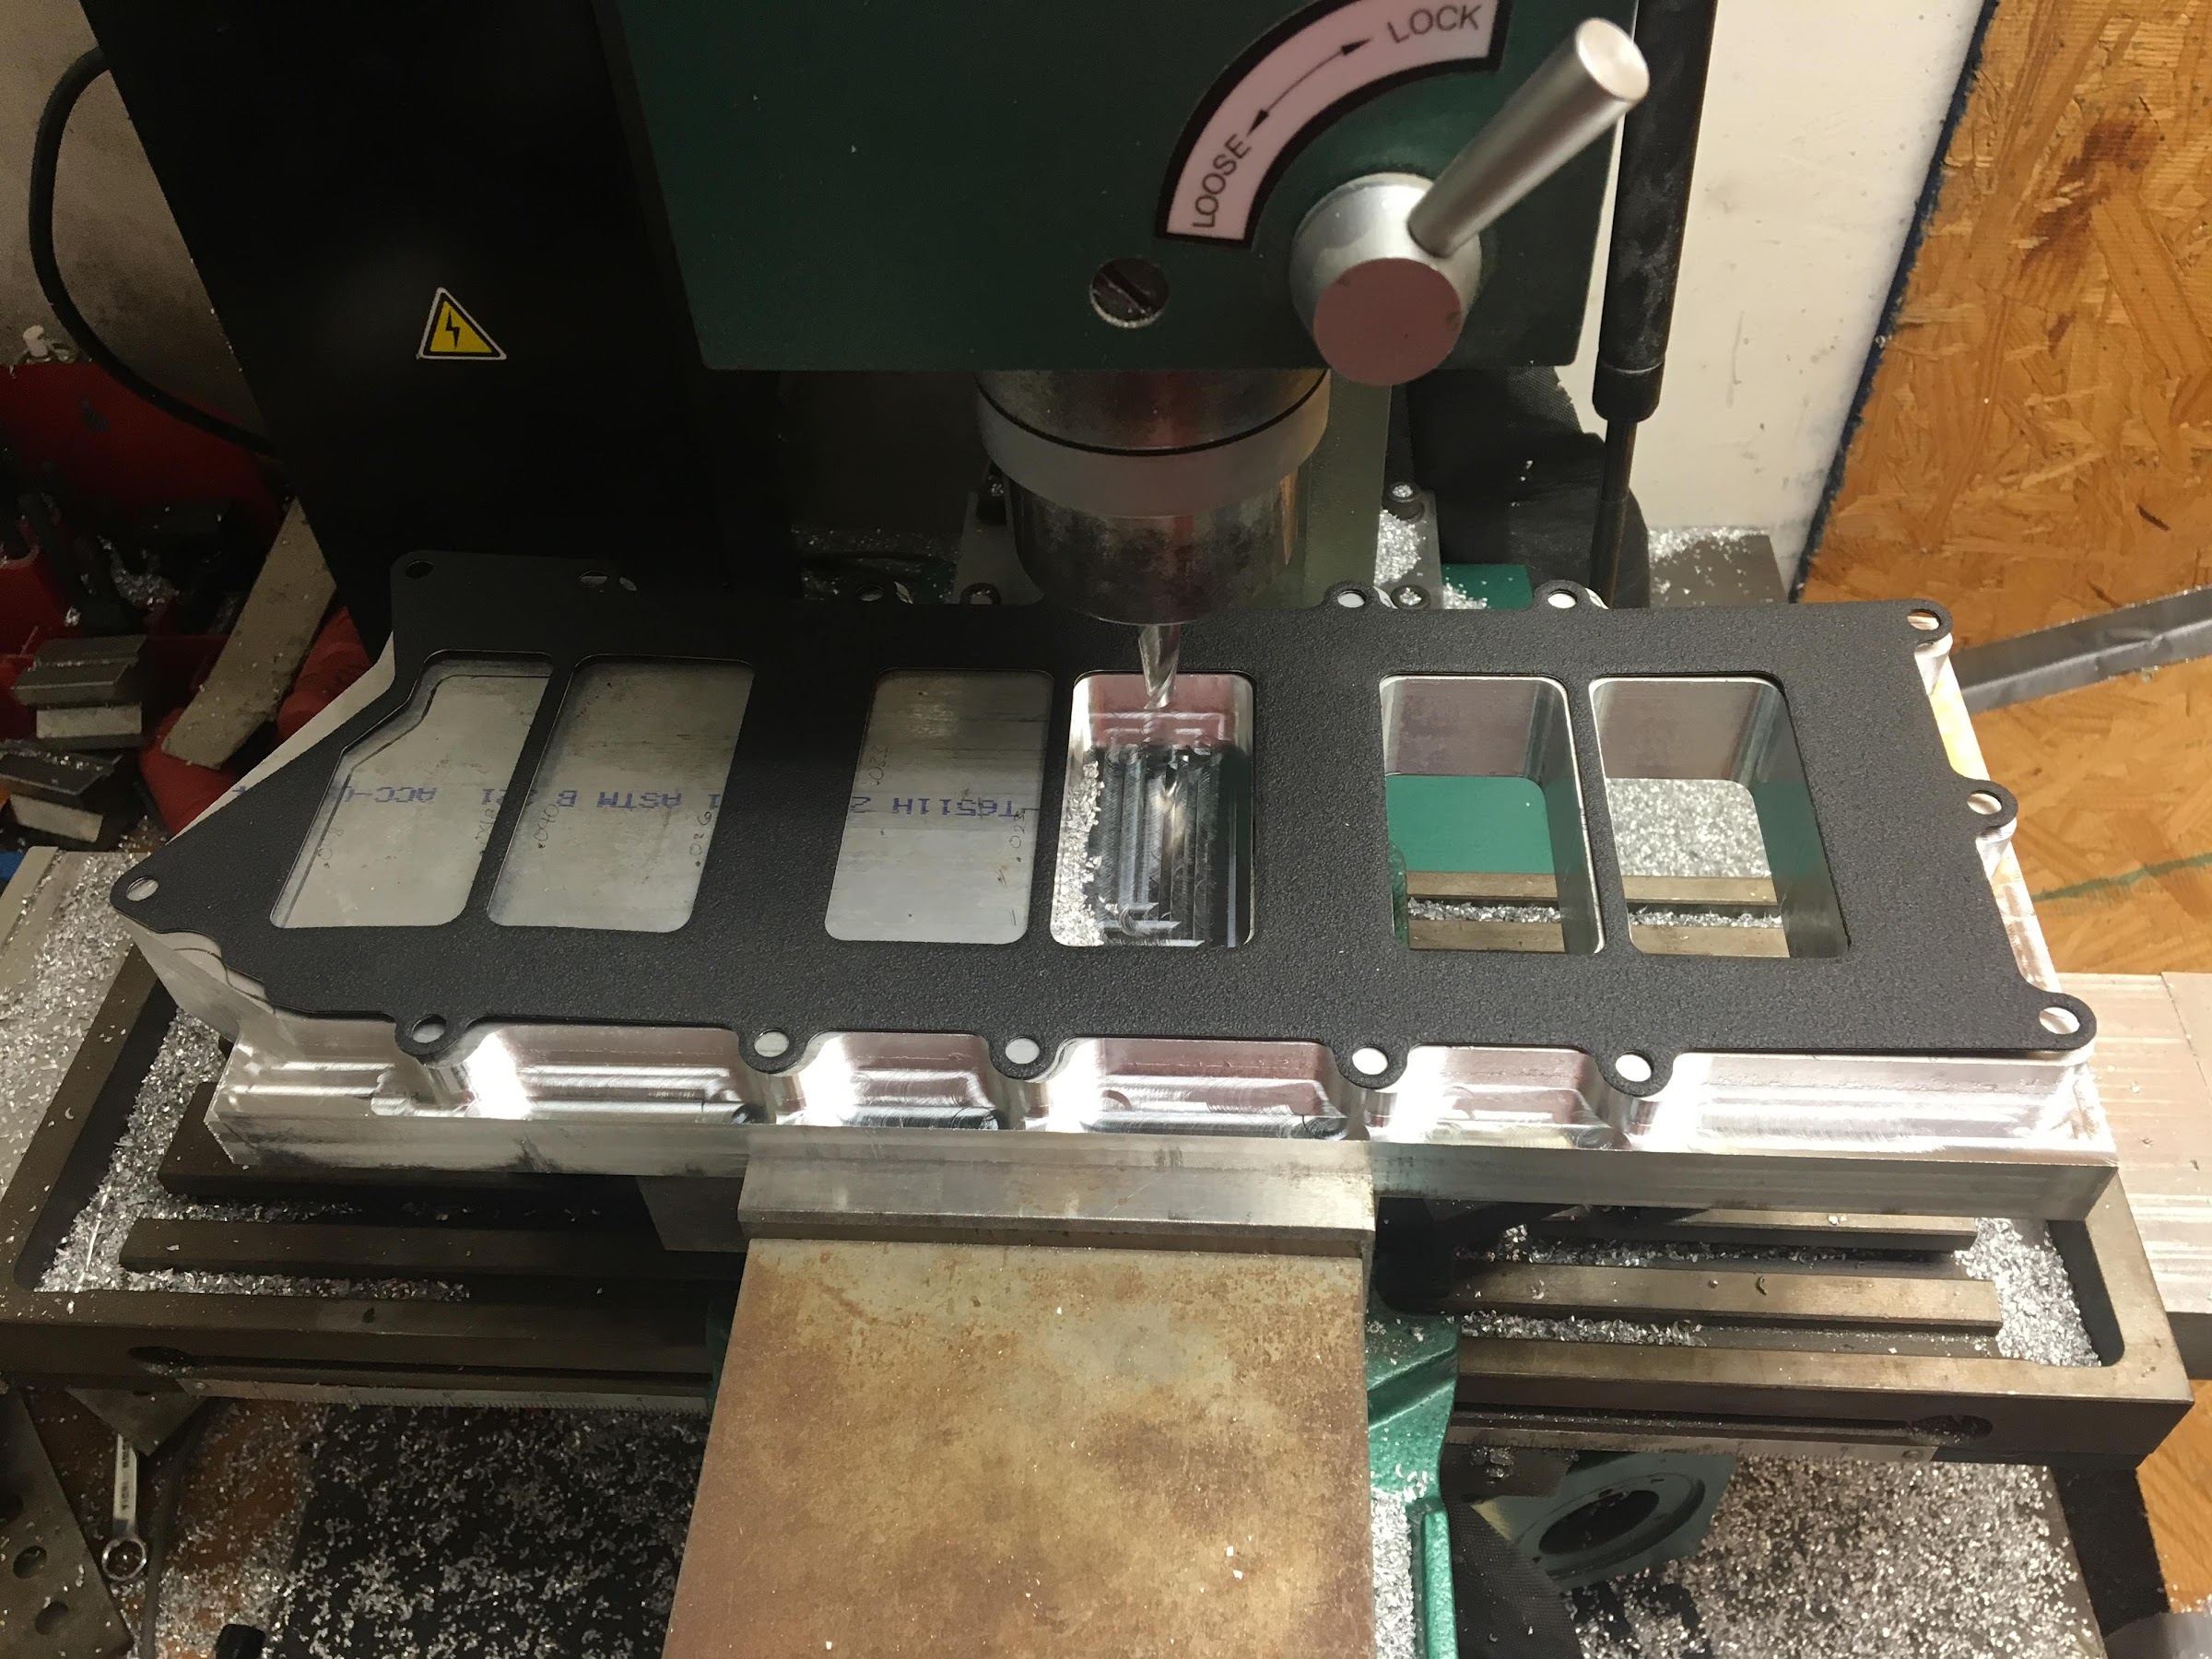
After milling from both sides it was sitting and looking pretty good:
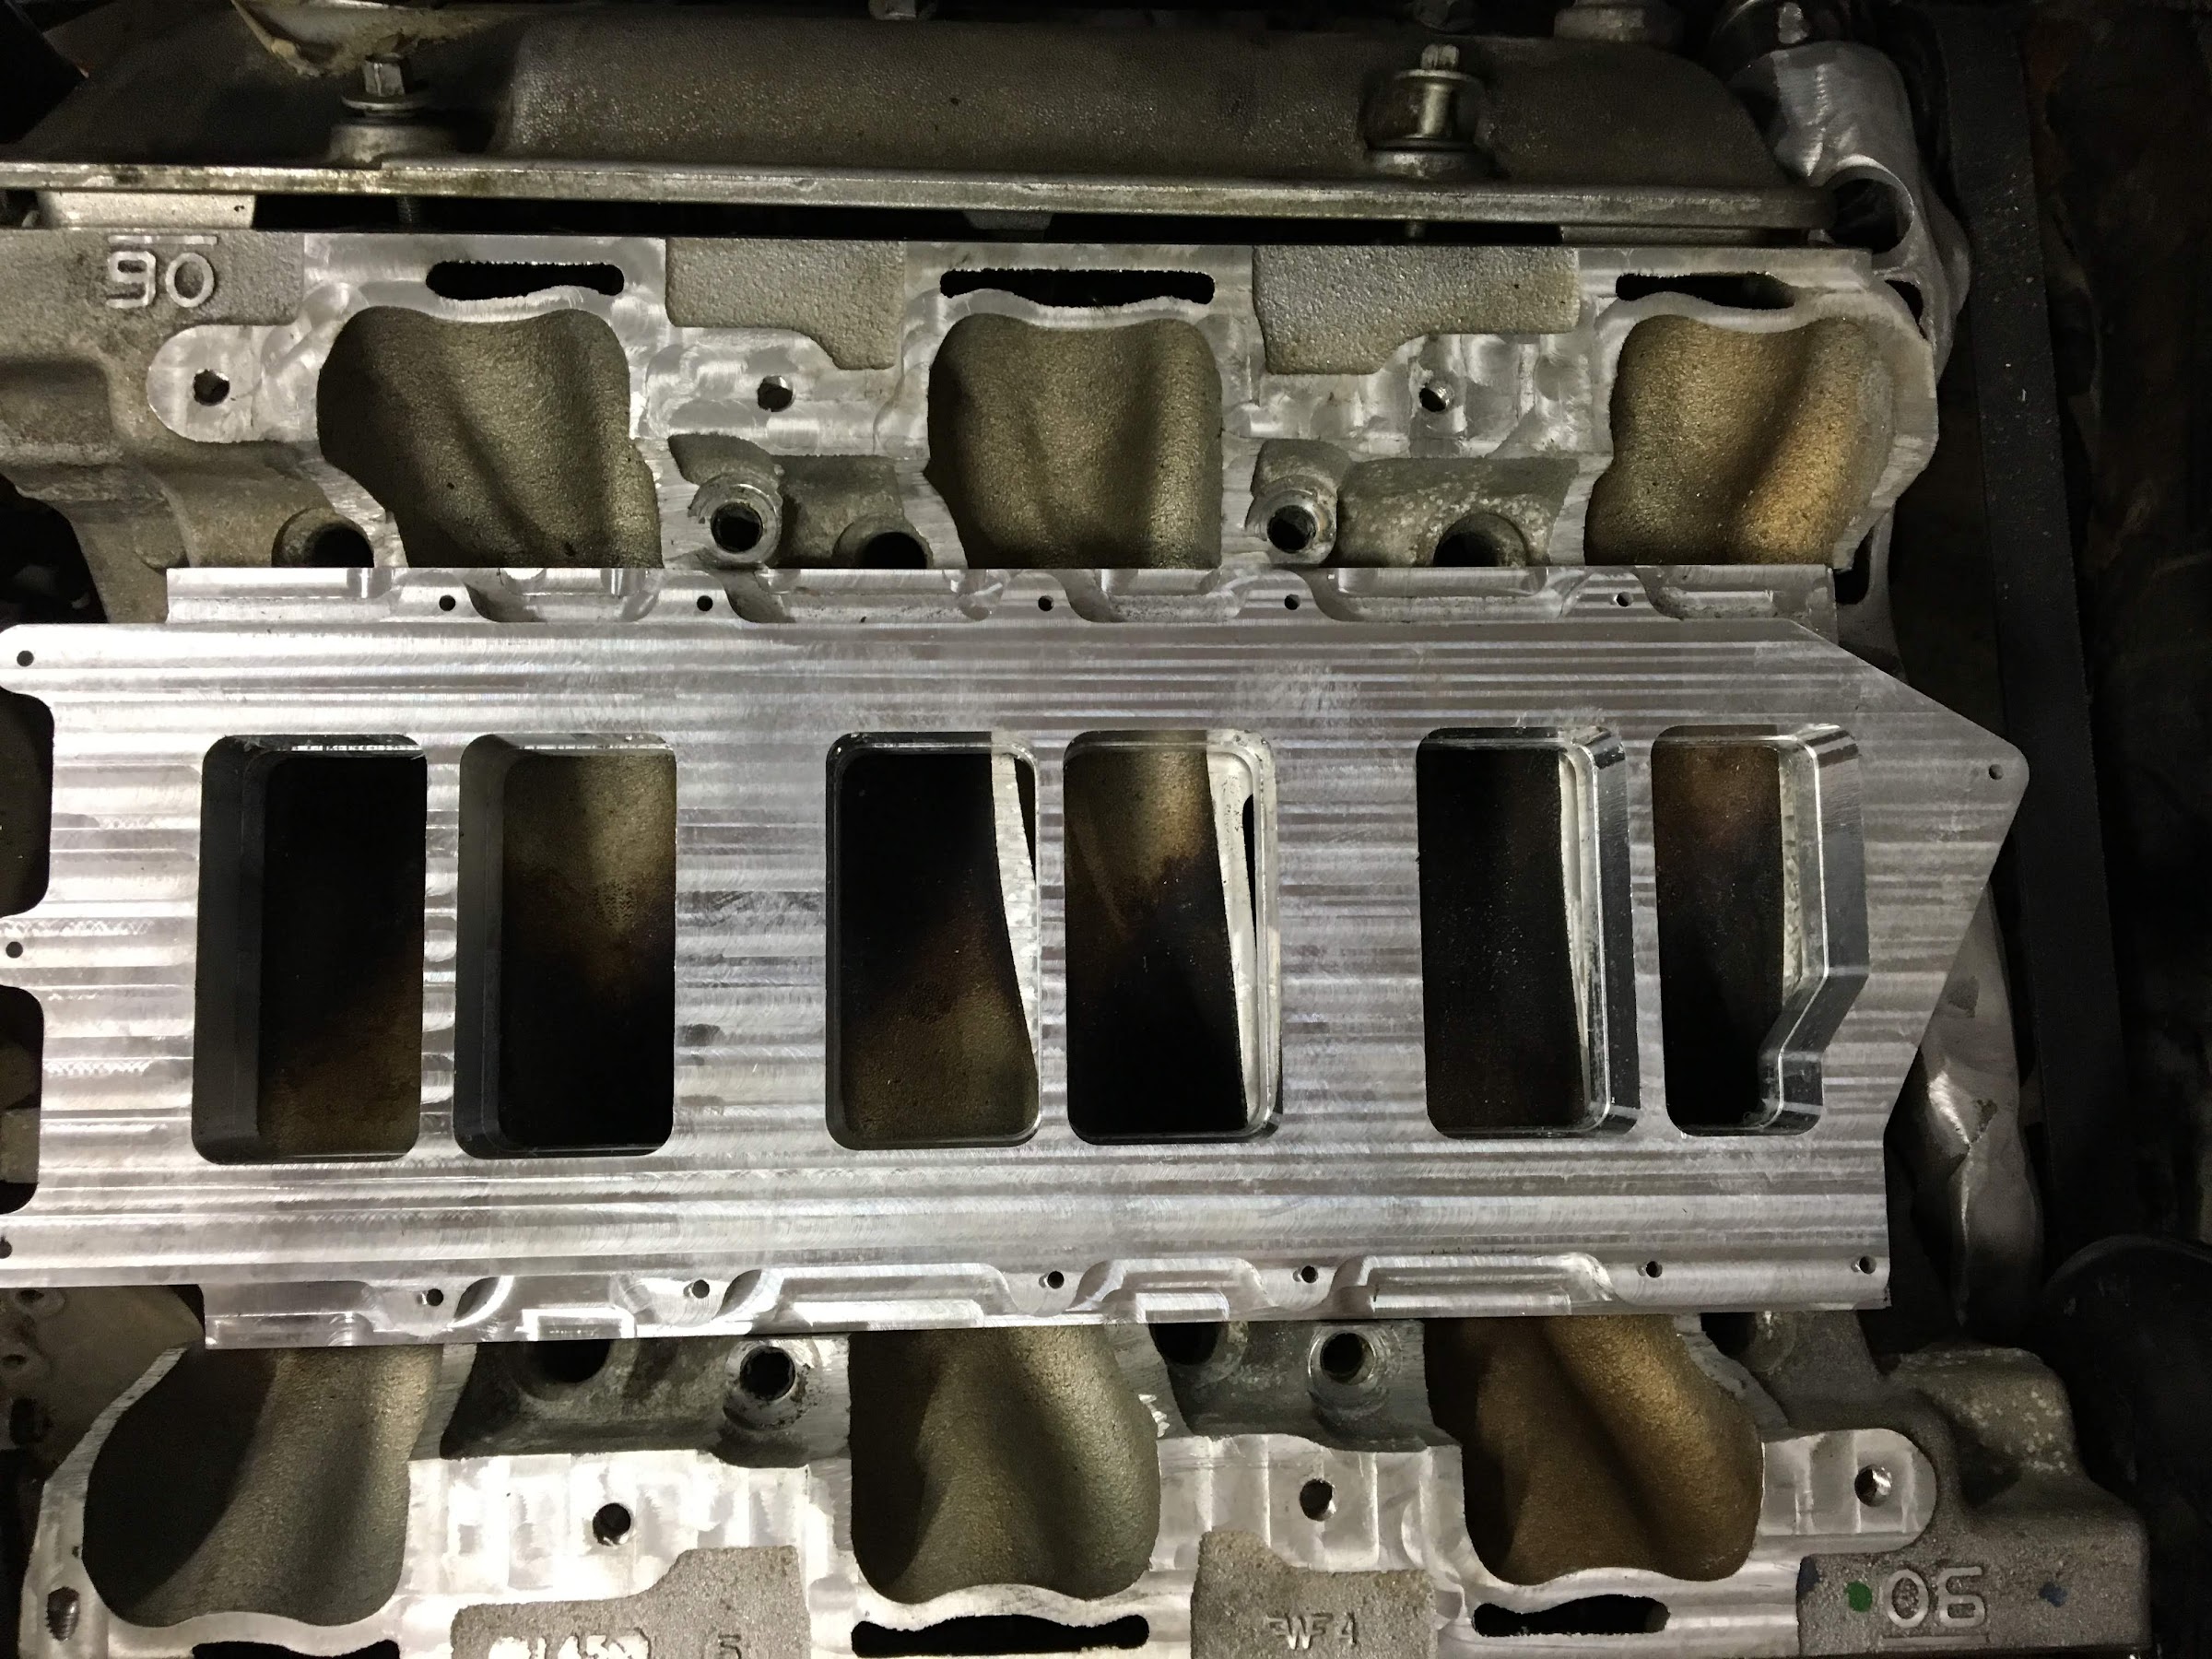

And the test fitting continued:
So we carried on to the next things. I took the stock cast rear manifold and removed the restriction and upped the pipe side to a nice 3" output:
The next challenge with using newer motors in fieros is the modern car radiator layouts and making the complicated thermostat and thermostat bypasses work, with the use of a T fitting I was able to utilize the thermostat bypass and get my heater core output:
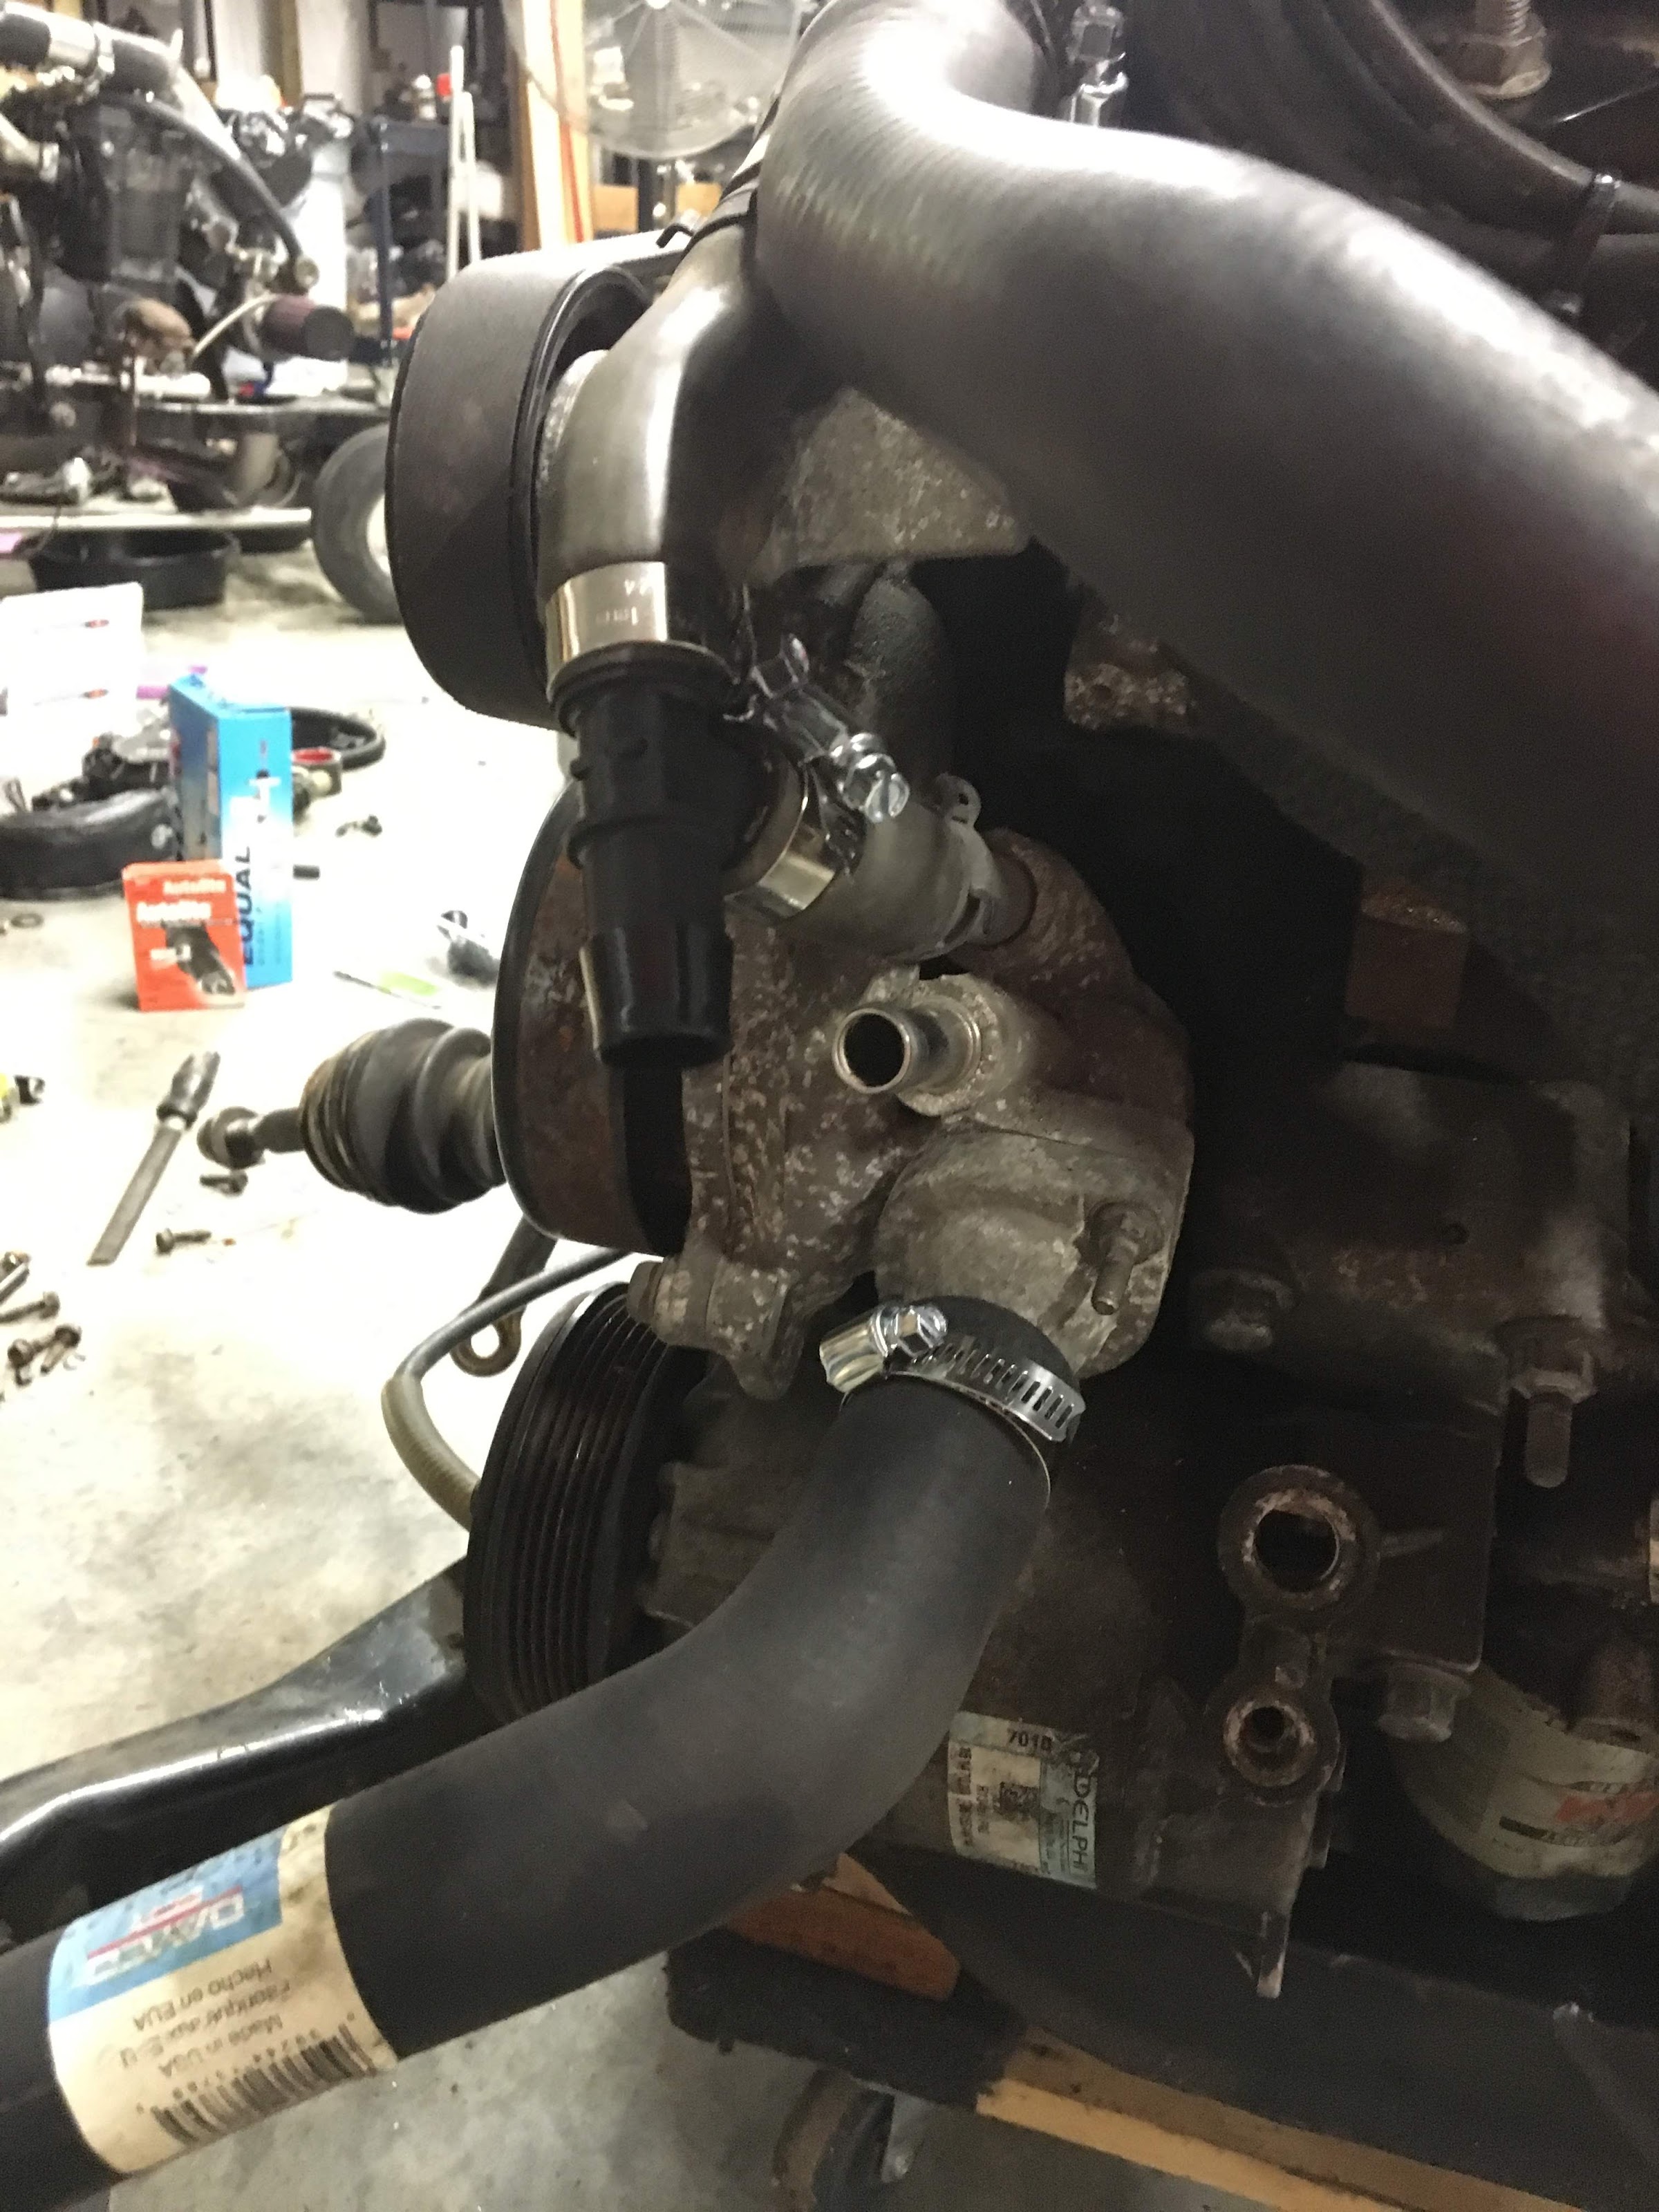
Then managed to find a rubber coolant line that allowed me to get the system back over to the driver side of the fiero:

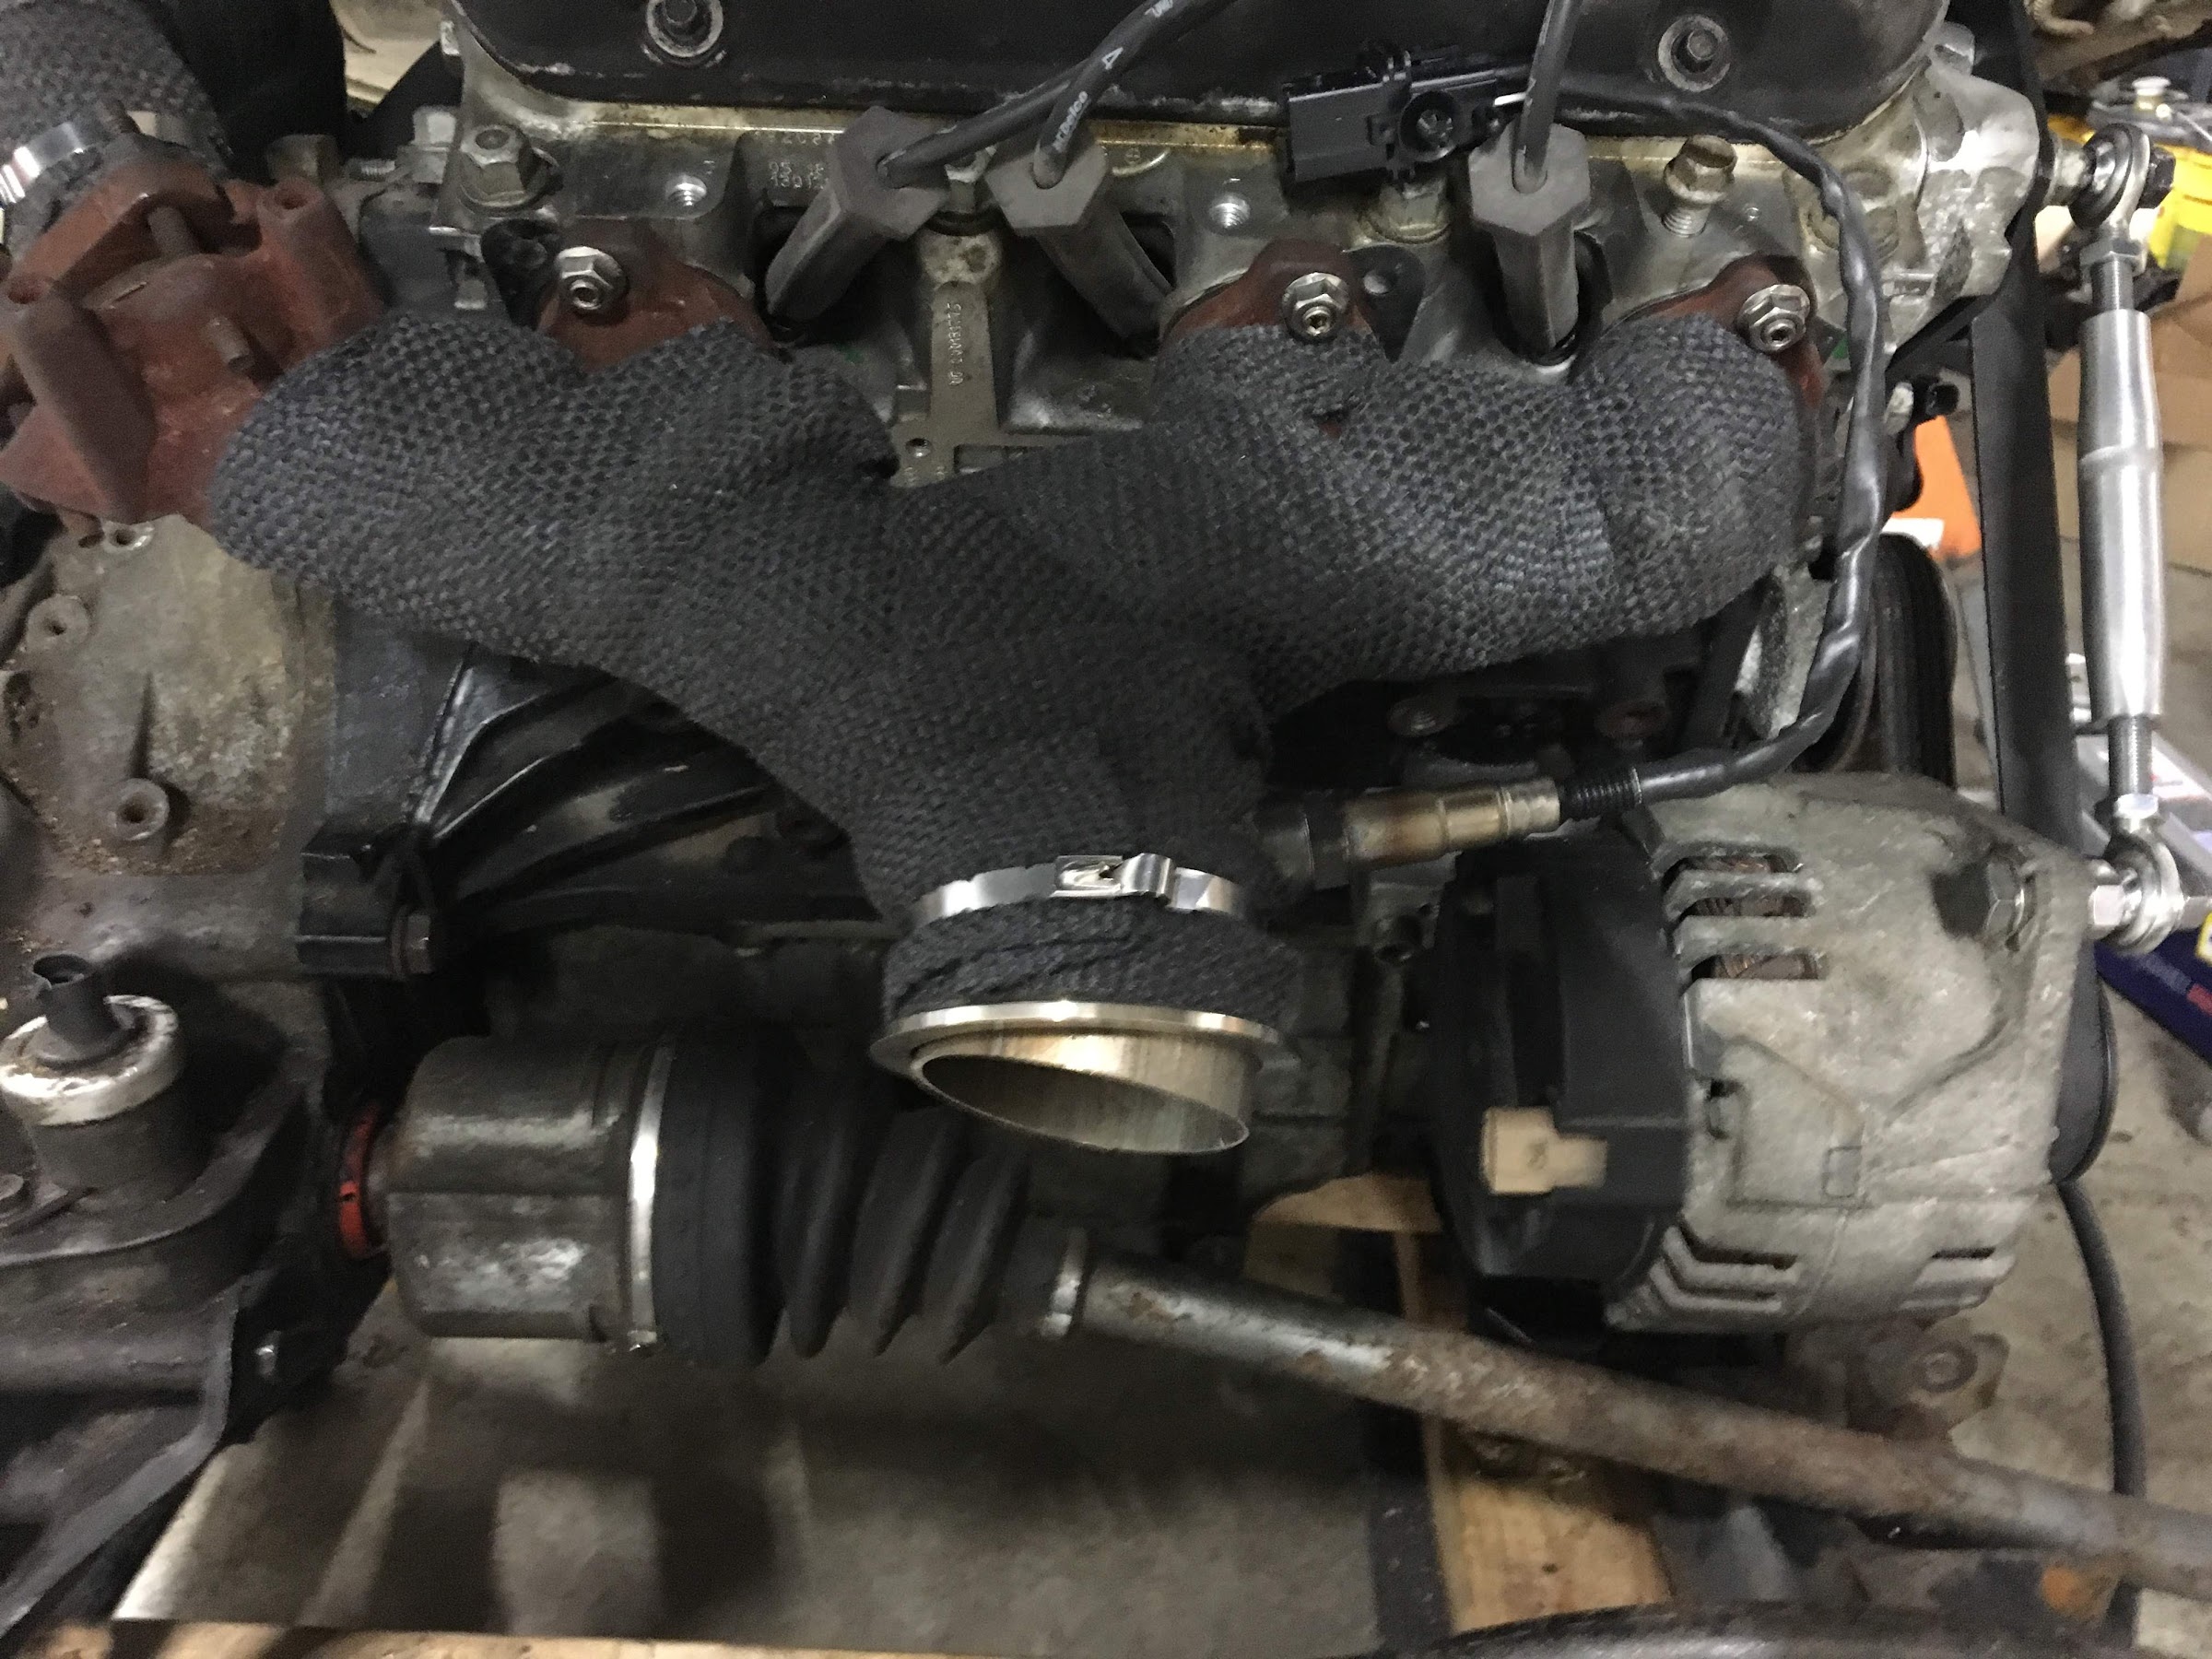
At this point things were starting to take shape and the TIG welding was getting taken care of. I cheated a little and cut the corner of my trunk to keep the exhaust routing simple:

Then got the rear manifold finished and wrapped:
Now came the part I didn't do a good job with pictures on. This motor is a variable cam engine and requires either the stock computer and some tuning, or adapted to the old school OBD1 computer from a 90s camaro, or lastly you can go stand alone computer. As a huge fan of the Megasquirt and Microsquirt product I went with Microsquirt to try out the limits of what it can handle. So with a bit of wiring and a few solid state relays to control the variable cam we got this:
Now for the big hurtle I have left out to this points:

Two stroke motors on the boats use a hole in the throttle body to keep the airflow and rpms at idle where they want them and that causes problems, namely a 3000rpm idle, for a street car. So with so painters tape I was able to have the car idling at an acceptable level, but still up there a ways. Well I came to the point of attempting to place rivets, from the bottom up to help prevent them falling into the engine, still could happen some day just have our fingers crossed for now :p
The next step was to get throttle working, and with access to a 3d printer I was excited to test its limits, well its limits aren't quite enough :p
More will be added as I get time so check back :)